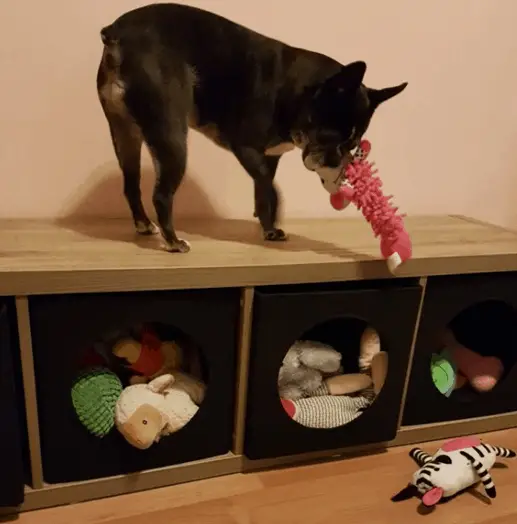
We all love to get toys and playthings for our dogs and cute little puppies, but over time, the toys begin to get too much and you watch them strewn all over the floor of your apartment. This is where the need for a small compartment comes in, so you could conveniently store all your dog toys. Dog toy box is a good dog device. But, do you always have to order your dog toy box? Not at all. There are several DIY dog toy box plans for you to try. They are simple, practical, beautiful, and easy to construct. Let’s dig into some homemade wooden dog toy box ideas.
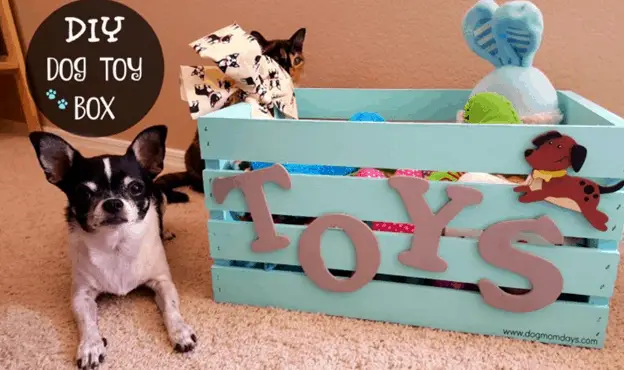
Popular DIY Dog Toy Box Stylish Ideas
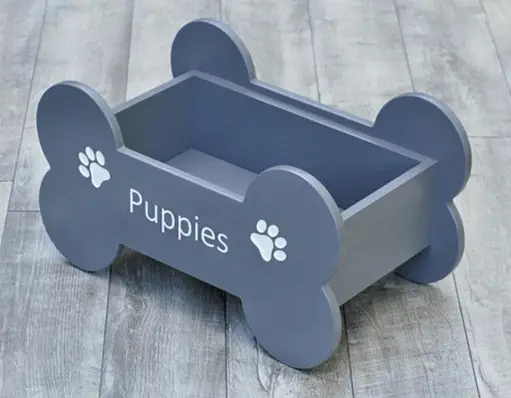
1. Dog Bone Toy Box
At first glance, you can already tell what this box contains. Even your dog recognizes this at once! It is made to look exactly like a bone and comes in different sizes and materials. It can contain as many small toys as possible. Another interesting feature about the dog bone toy box is that it has a decorative effect it. With the proper stain or paint, this dog toy box will blend well into the atmosphere of your interior decor.
2. Bucket Dog Toy Box
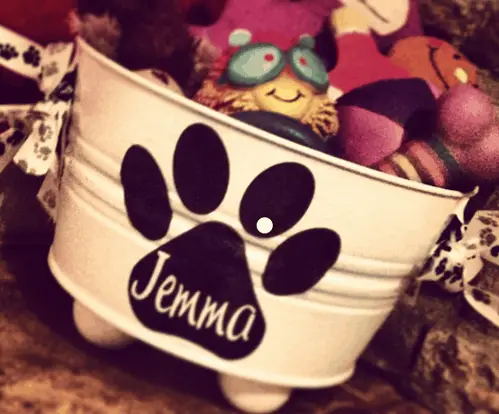
Well, some persons value depth over fancy. This is what the bucket dog toy box achieves. It is made in the shape of a bucket and sometimes with a lid. If your dog has tons of playthings, the bucket dog toy box might just be the perfect choice for you because it has enough room for toys. You could as well personalize it by painting the name of your dog on it.
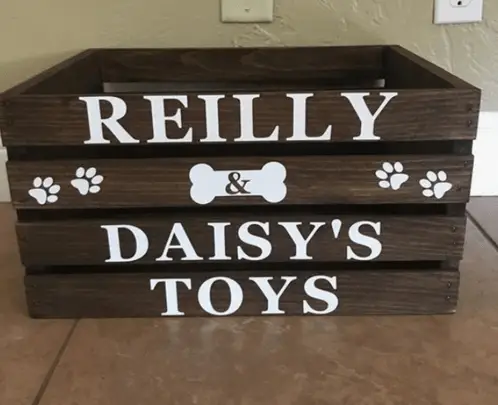
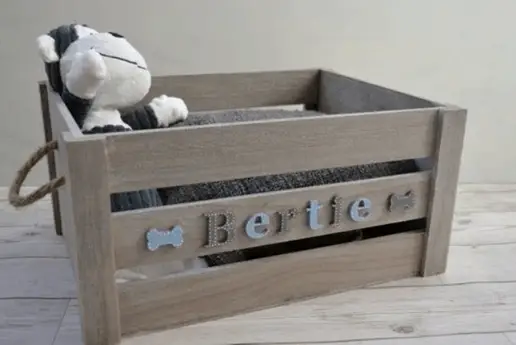
3. Personalized Dog Toy Box
This stool-shaped box has amazing benefits to it. It is made with a hinged lid that helps you store and empty the box when necessary. How does your dog get to pick his/her toys since there is a lid? There is a hole close to the base of the box wide enough for your little puppy as well as your mature dog to easily pull out one toy after another. The design is suitable to both you and your dog. Plus, it is very easy to build.
4. Natural Dog Toy Box
This customizable dog toy box design is a very comfortable plan for your dog to pick his/her toys easily. It comes with a lid that you can completely remove and place somewhere beside the box while your dog does his or her thing with the toys. You can choose to customize it with the name of your dog or literally any shape that appeals to you and your dog. It is advisable that you build with a light wood such as plywood so that the lid doesn’t become too heavy for you to remove and replace.
5. Small Bone-shaped Dog Toy Box
Whereas the one-shaped dog toy box looks very much like the dog bone toy box discussed earlier, this plan has a separate touch to it. Dog owners prefer a solid base with the dog shape as a design and that is exactly what this dog toy box offers. It is small and easy to carry about just in case you want to shuffle furniture around your apartment to give it a new look. You could also take the dog toy box along with you and your dog on a long journey!
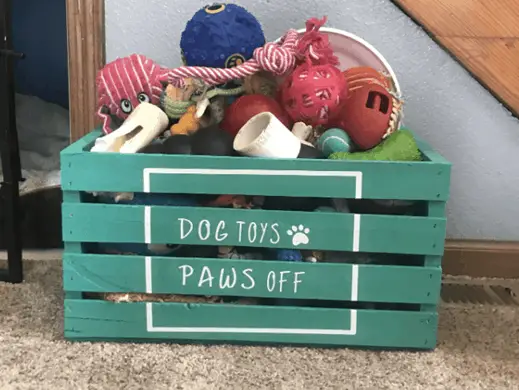
6. Crate Dog Toy Box
Talk of crate rest? This is where your dog finds all the comfort he or she needs. It is large enough to occupy your dog and his/her toys. It is also very easy to build and allows you all the creativity you want with colors. Built just like a crate, you can choose to paint the entire box with just one beautiful color or decide to spice things up a bit with two blending colors.
Much of the materials and steps involved in building these DIY dog toy box ideas are the same, with one or two small here and there. Find the steps to build your DIY dog toy box further down in this article.
Drawing Your Own Wooden Dog Toy Box Blueprint
Drawing a wooden dog toy box blueprint is quite easy. Whether you’re a beginner or a professional, there is always a suitable approach to drawing a toy box plan. While some people prefer the age-long paper and pencil method of drawing due to the freedom it allows, some others would rather use the modern software. Whatever your choice is, sketching a plan for yourself makes it easier for you to adapt the dog toy box to your preferences and taste and that of your dog. Here are some of the factors to consider when drawing a dog toy box blueprint:
1. Number of Dog Toys
The number of toys your dog has, or will have, determines the size of the dog toy box. So, while drawing out your plan, put into consideration the number of playthings your dog has as well as the ones he/she will have soon. We all love to get our lovely little friends one gift or another from time to time, but will the dog toy box take them all? You either decide to build a large dog toy box or you replace the old toys with new ones.
2. Available Space in Your Apartment
How much room have you got in your apartment? The reason you want a dog toy box in the first place is because you don’t want your dog leaving his/her playthings lying about the house. So, if your apartment is not so rich in space, you might want to make do with a DIY dog toy box of an average size. As you draw your blueprint, be clear about the specifications of size.
3. Your Budget
Another key factor to consider while creating your homemade dog toy box plan is the size of your pocket. Whereas most DIY dog toy boxes do not require much funds, some of them could be quite expensive to make. Many people choose to draw out their own dog toy box blueprint and DIY the box themselves because the factory-made ones could be somewhat on the high side and even unsatisfactory, but that is very relative. As you draw out your plans, consider the cost of materials needed, tools, decorative items, and so on. The size of your budget will determine several other factors such as quality of materials used and size of the dog toy box, among others.
4. How To DIY Your Dog Toy Box
To DIY a stylish dog toy box, take note of the following steps:
1. Draw your Dog Toy Box Blueprint
The first step to build your dog toy box is to design a blueprint. You could sketch a plan on paper or use any of the modern design applications for it. Clip arts are common examples. However, the traditional paper design is the better approach because you can always have it around while working. On the other hand, if you’re not so sure how to design one, you could download designs from the web.
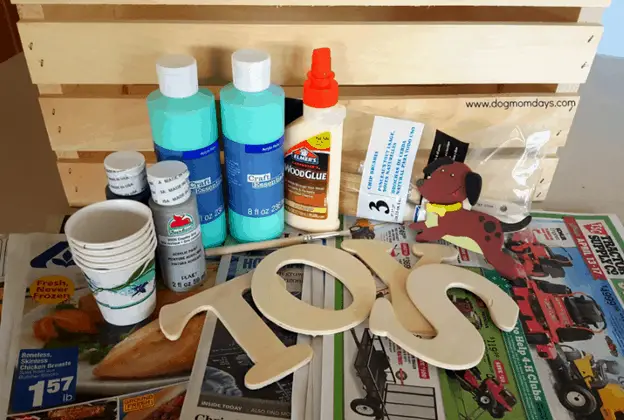
2. Gather Your Materials and Equipment
Your selected design or dog toy box plan will affect the materials you need to DIY a dog toy box. Notwithstanding, some of the most basic materials and tools you need are as follows:
Wood
Wood glue
Spray paint
Wood filler
Kreg jig
Sandpaper
Sawing machine or handheld jig saw
Nails and screws
Circular Saw
Wood stain,
Paint, etc.
3. Cut Out the Necessary Wood Parts
This is where the actual technical work starts. Cut out all the major parts of the dog toy box design you sketched. For some specific designs, you will need to carve out the parts directly from the plywood using a jig saw. After cutting out all the parts, sand off the rough edges.
4. Drill Holes
Your kreg jig comes to use here. Place all cut out parts that require drilling neatly into the kreg jig one after the other. Adjust the jig to give you the size of the right holes you need.
5. Assemble all Parts
Place all adjoining wood parts together and glue where necessary. Use a square to help you balance the edges and keep them straight. You should also use the hole screws to hold the wood parts where necessary. Screw in neatly to make sure there is no lopsided area on the dog toy box. After assembling all parts, use the airstrike nailer to nail them in. At this point, your wooden dog toy box should be standing.
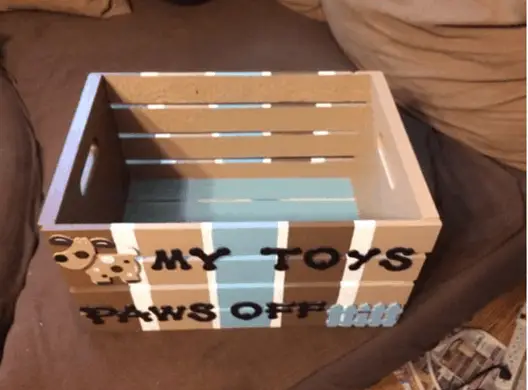
6. Sand and Stain or Paint
After completely assembling your wood parts and your wooden dog toy box is set, sand thoroughly and fill up the holes in the nailed parts with wood filler to make the surface all smooth. After that, you can get further creative with the outlook. It is time to use the stain or paint color that appeals to you. Stain or paint neatly and leave dry completely. You could also personalize the dog toy box by painting the name of your little furry puppy on it.
Dog Toy Box FAQs
1. How To Make Dog Toy Box For Beginners?
There are certain dog toy box tips for beginners, who are still new to woodwork as a whole, or specifically, new to making a homemade dog toy box. Generally, the steps involved in making a wooden dog toy box are the same for beginners, intermediates or experts. The only difference is that experts can choose to spice things up a lot! You can refer to the steps discussed above for guide. Some helpful tips include:
- Start with a simple practical dog box design.
- It is advisable to use a dog box template rather than build a blueprint for yourself. This will boost your confidence level.
- Practice using the jig saw before embarking on your dog toy box project because the tool could be very tricky to use.
- Ensure all needed tools and materials are all available before you set to work. Crosscheck against a list if you have to, so you don’t have to run back to the mall for one or two supplies right in the middle of work.
- Refer to a guide or sample as you work. It is important to have a model that you’re using as a guide. Combined with the blueprint, a finished dog toy box will help to hasten the process.
2. What Wood Should I Use To Make A Dog Toy Box?
Whereas pine wood and plywood are the easiest to work with, they are not exactly the best options for a dog toy box. I like to recommend the oak wood because it is sturdy. For designs and decorations on the dog toy box or some special wooden dog toy box plans, you could still make do with plywood because it is light.
3. How Do You Keep A Crated Dog Entertained?
There are quite a number of reasons why your dog would need a crate rest especially during treatment, recovery from a surgery or injury, etc. However, the dog doesn’t have to be bored or abandoned during this period. This is why you need to keep him/her entertained. Here are ways to keep your crated dog entertained:
- Show Some Affection
Understand that your dog needs all the attention he/she deserves at this point in time. You should be around much of the time to give him/her rubs on the snout, back rubs and so on. If you can’t help being absent, encourage other people at home to spend time with the dog.
- Reduce Physical Movement
Especially when the situation relates to surgery, be sure to reduce the physical movement of the dog. Do not exert them or make them go through activities that would cause stress or strain. However, this is not to say you should leave them bored.
- Keep the dog engaged
Speaking of boredom, this is not the time to leave your dog alone. Get toys and small edibles that will keep the dog engaged but not stressed.
- Extend Meal Periods
As a way of keeping your dog engaged, extend the meal periods and stay around while they chew. This will minimize the time your dog spends with him/herself.
Conclusion
The ideas for your homemade dog toy box are extensive and they allow for creativity. In other words, do not let yourself be restricted by templates. Go creative and do something special for your lovely furry friend. In addition to all the DIY dog toy box plans discussed here, you could design your dog toy box to suit your dog in a unique way.