When we consider interior designing and ways to transform the spaces into elegant representations, immediately side tables spring to mind. Ultimately, these tables set out for a useful purpose and an easy way to decor your home. If you have a low budget, multiple DIY side table ideas are utilizing antique materials, window panes, industrial piping, and many more.
These DIY side table plans explain everything from building instructions, color photos, diagrams, and to-do lists. Besides, here we explain various styles and free simple end table plans including a modern, farmhouse, mid-century modern, rustic, and contemporary. Also, side tables are stapled pieces of a home, providing valuable storage space for whatever you put there.
[toc]What’s the advantage of side table ideas?
The side tables reflect a big presence, according to your collection of different styles, shapes, materials, colors, and sizes. Every home has the tight nooks – besides the bed, next to the alcove, at the end of a hallway. Therefore, just by adding a DIY narrow side table with a small footprint, you can entirely transform the narrow unusable spaces.
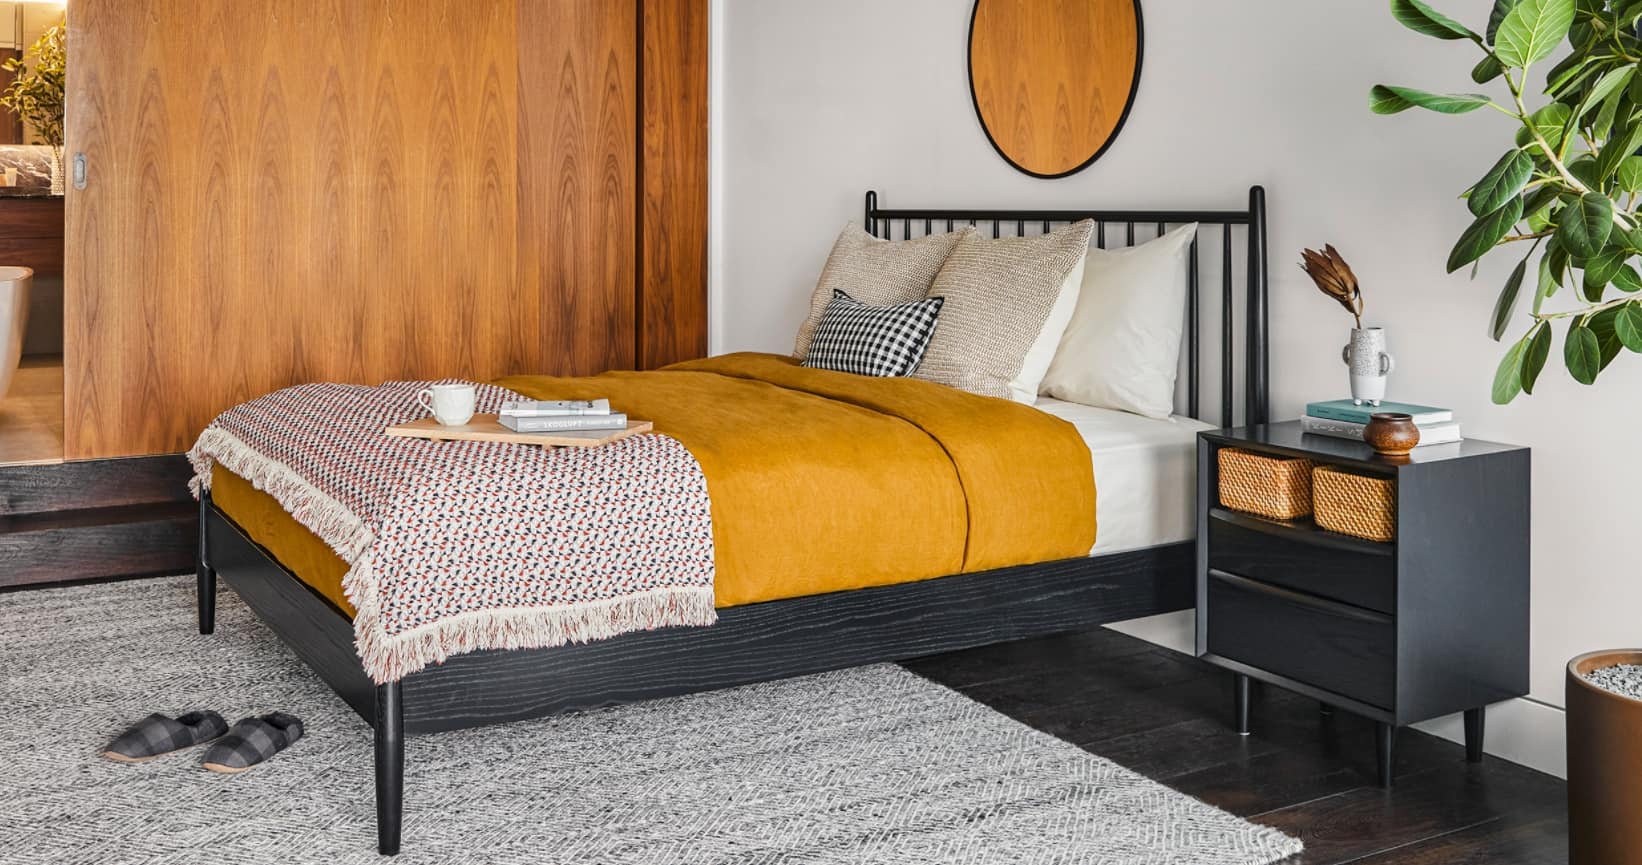
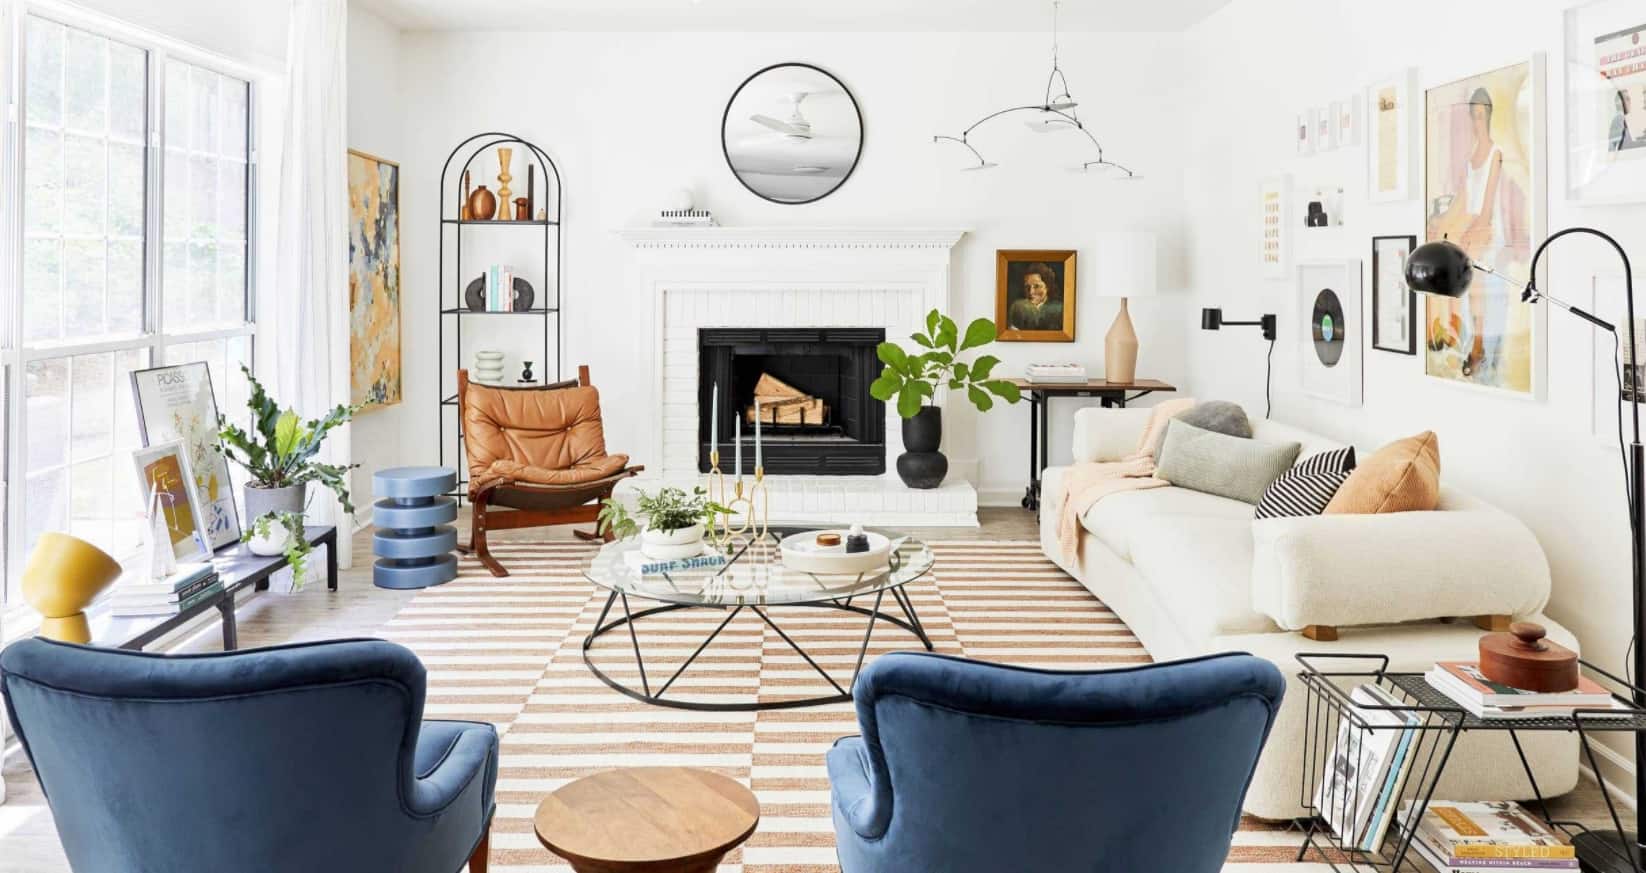
If there is plenty of space available beside your armchair or sofa, take the edge by adding a generous side table to display photograph frames, statement lamp, and various decorative pieces. Choosing a large side table does not mean to flood the room. However, side tables are not restricted to the living room; they can also use in a bedroom. When it comes to opting for a bedside table, the best one is surely a Diy side table with storage that will make the most space available.
Some spaces have not the perfect proportions, therefore, while selecting a side table for those locations, think about alternative shapes. A tripod table with its circular top and slender legs is perfect for those awkwardly shaped small spaces. If any corner of your home is looking empty, then obviously the missing piece is a side table. As they bring a new segment into your home decor. Moreover, some models can offer the benefit of giving different levels of storage.
Here we discuss some popular DIY side table plans; these plans are helpful for everyone and give the inspiration to get started.
1. A DIY narrow bedside table
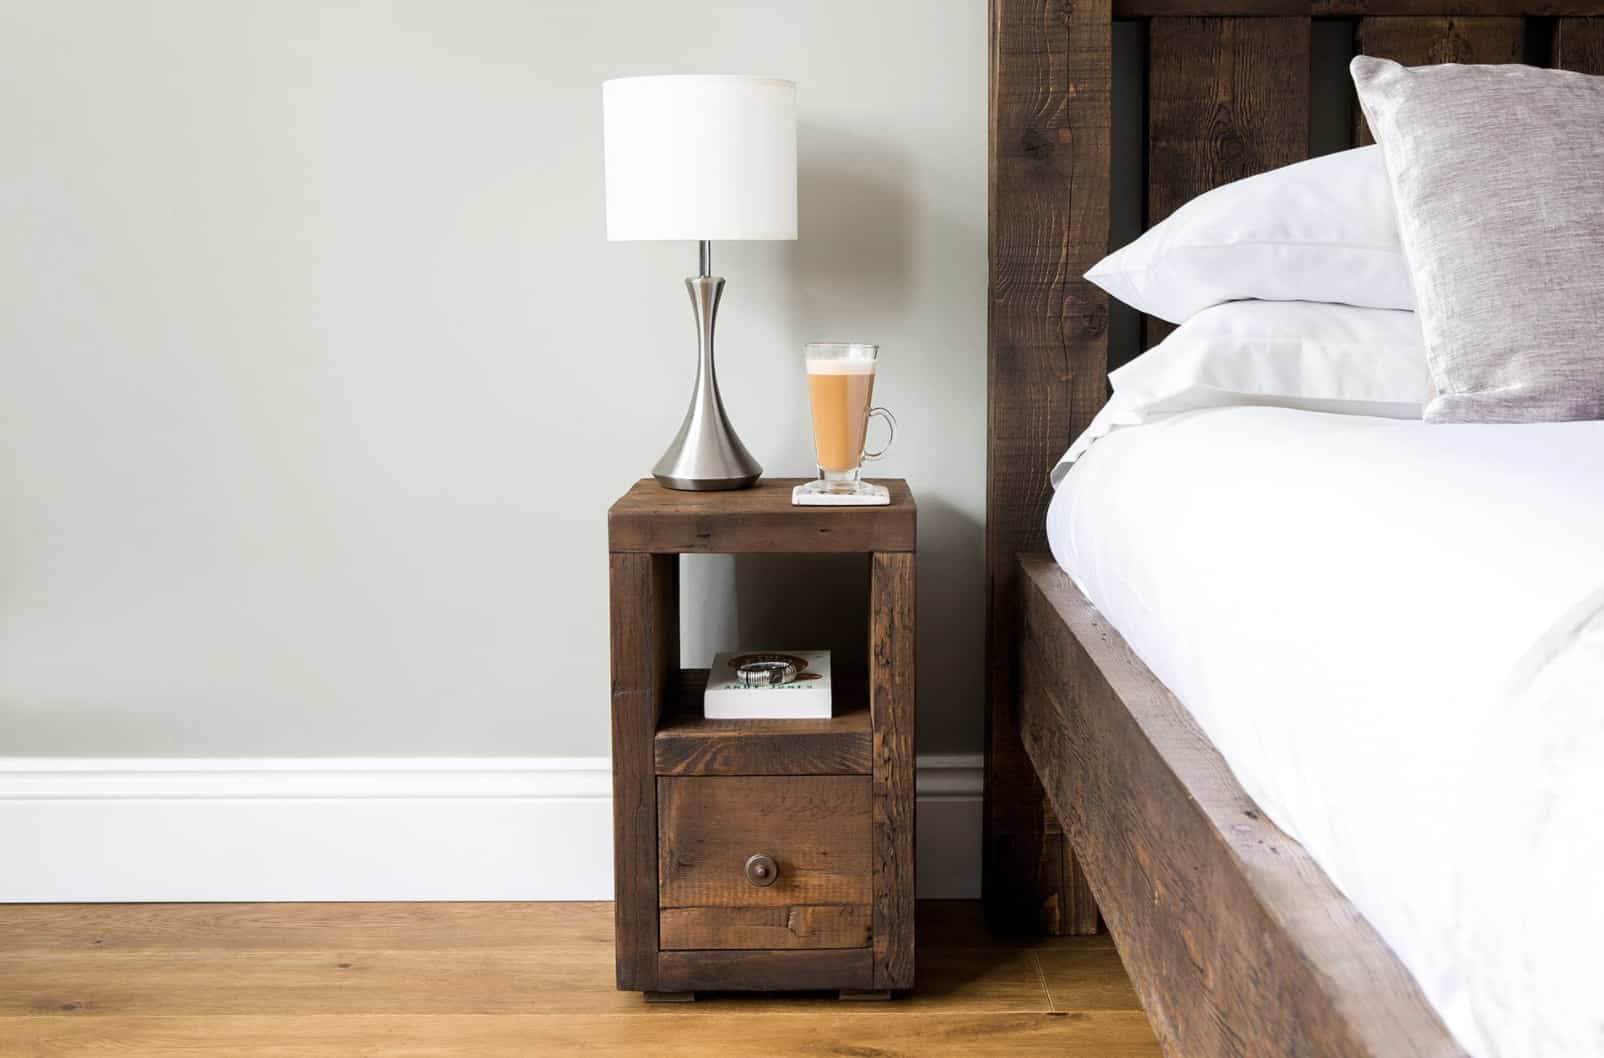
The biggest challenge while living in a small bedroom is to find places to put your stuff. If you want to buy a nightstand for your bedroom on a very tight budget, you can make them from second-hand and old bar stools. It will cost you less and can manage from any thrift store. Surely, you would love to give those old stools a makeover and convert into a narrow high bedside table.
2. A simple DIY hairpin table
You can make your DIY hairpin table. It’s quite easy and simple. You will need a few tools, a round wooden board, and hairpin legs. After following a couple of steps, you will make your own unique and stylish hairpin side table. Also, you can repaint it with a different style and your favorite color.
3. A DIY nightstand
You can easily use a white end table plan to build a very appealing nightstand. Add a special touch of a different style into your room with this nightstand. You need some tools, a few plywood sheets, and hairpin legs. You would surely make it by taking all the necessary precautions smartly and safely.
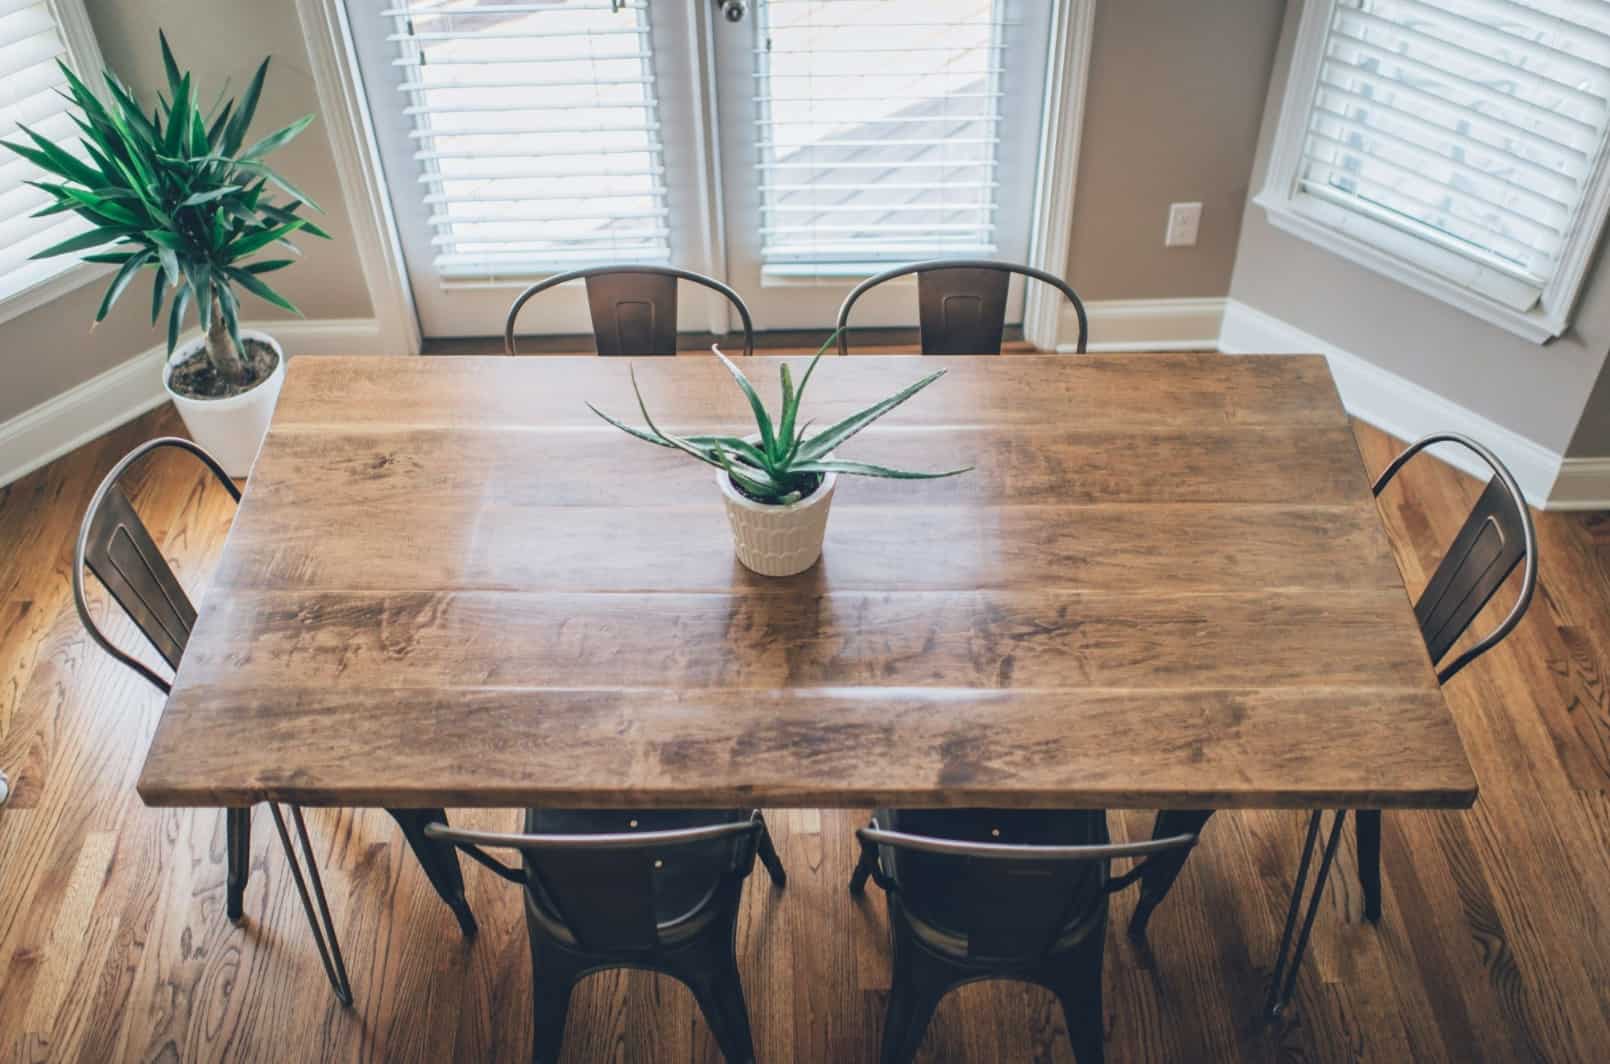
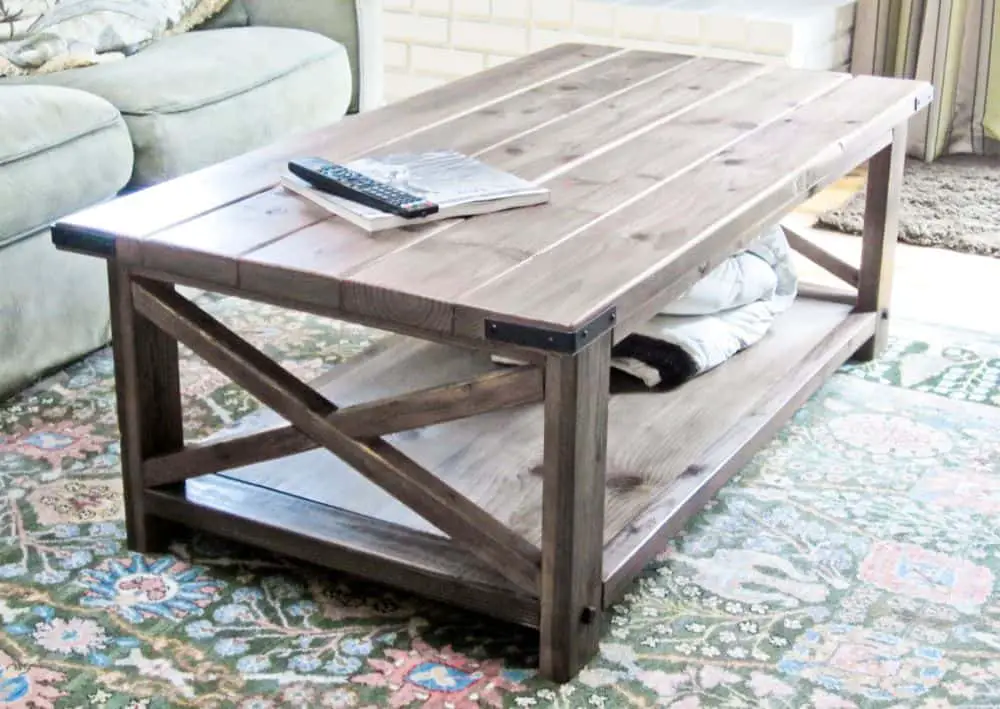
4. A DIY farmhouse end table

If you are a fan of the farmhouse style, you will love to make this DIY farmhouse end table. The very first step is to build the sides of the table. It also includes decorative X boards to enhance the overall look and add detail to it. Always use glue for a stronger hold and wipe excess glue off.
5. A simple DIY end table
If you like the hairpin leg styles table but want something new as compared to a plain wooden top this plan is perfect for you. Using a crate, chalk paint, hairpin legs, and a drill, you can make an easy and decorative side table. Place it in your entryway or it would also stand out in your living room.
6. A DIY accent table
Are you looking for an accent table to go with your armchair or sofa? Here we present one of the most perfect and unique table plans. It’s the super easy and fun DIY project using a round wooden board along with a laundry basket.
7. A DIY laptop table
If you just love to spend hours and hours in front of a laptop, or you are a home-based worker then definitely, you need a sofa table for your laptop. This easy-to-do, simple, and stylish plan will not be expensive. You would love to see its final look especially the way legs are designed. You can easily put your laptop where you need and it fits perfectly under your sofa couch. It’s a very convenient and super functional side table.
8. DIY colorful end table makeover
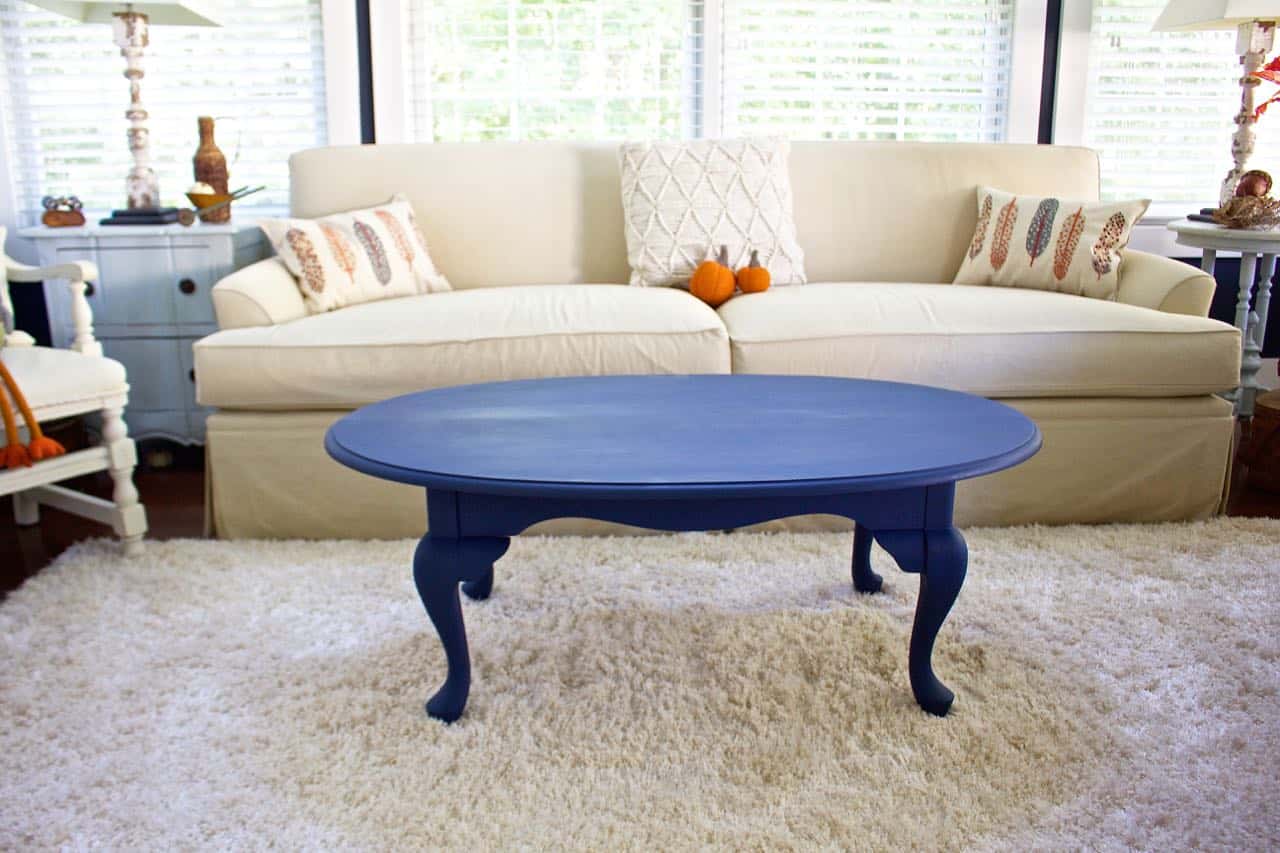
If you love the mid-century style, you can make a beautiful side table as given below. It’s super stylish and budget-friendly, all you do is a small and decent makeover. No drilling, no sanding down, nothing. First, use a primer and then some paint.
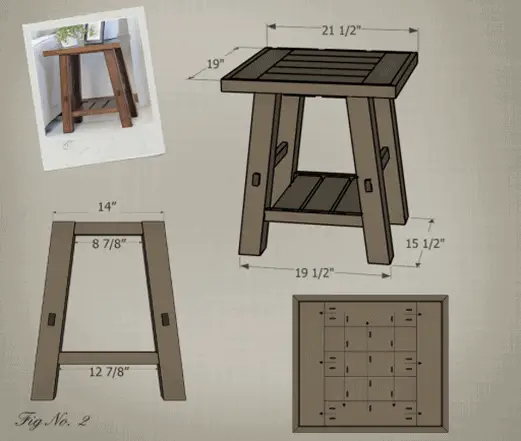
9. DIY side table blueprints
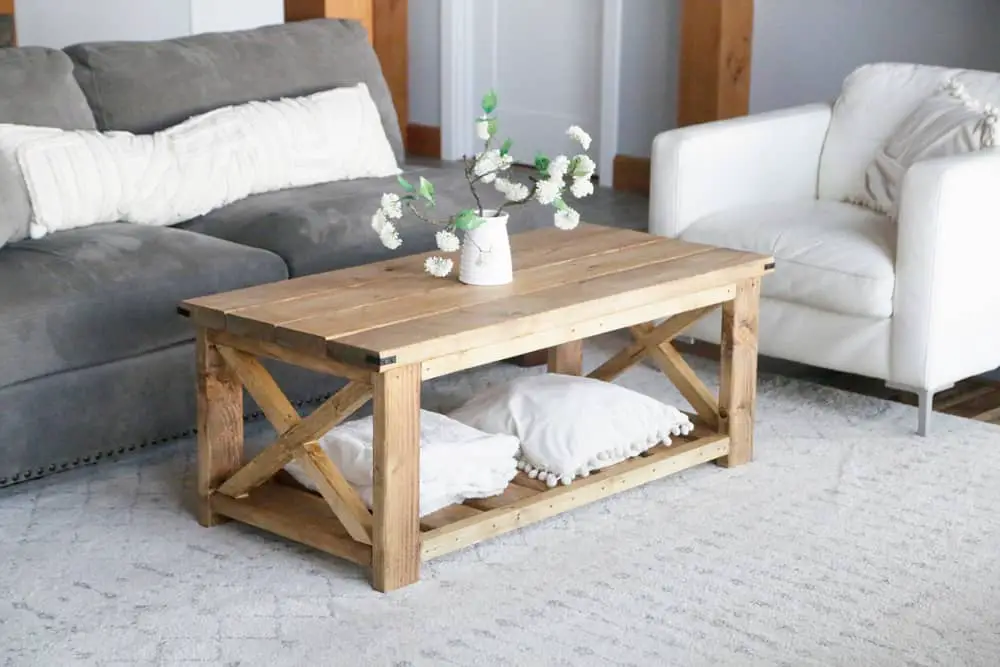
DIY side table plans help you to make an elegant and wonderful centerpiece for your home as they look great in appearance and very functional. For making, a DIY end table is a super easy woodworking project, and by following DIY detailed plans, you will have it built-in very efficiently.
Before starting, make sure to search all the DIY end table plans and choose the right style for your home according to your taste. You will find simple, contemporary, rustic, farmhouse, mission, and modern DIY end table plans. As a beginner, you should choose a style that matches your skill level and talent.
How to build a DIY side table?
If you are going to make the very first time and a little bit confused regarding no woodworking skills. Still, you can create a DIY end table without any experience. Here we guide you about all the items you need in this project.
1. Things you need for this DIY project
- Drill
- Miter saw
- Glue
- Tape Measure
- Table saw (if you are going to ripping the legs)
- Pneumatic Nail Gun
- Speed square
- Bar clamps
Most of them are available at home and the remaining can easily be available at the market. These tools are worth buying and use every DIY side table plan later on.
2. Steps to follow
Step 1:
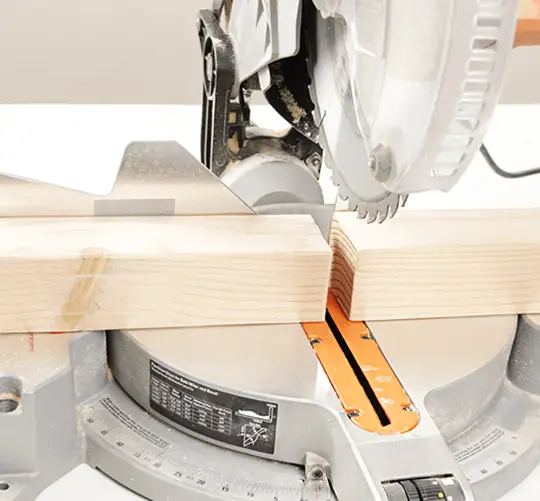
Using a miter saw cut all the parts according to the given size except the Tabletop. If you want to rip the legs to make them slimmer then use a table saw and cut it into two adjacent sides to 2¾-inches-wide.
Step 2:
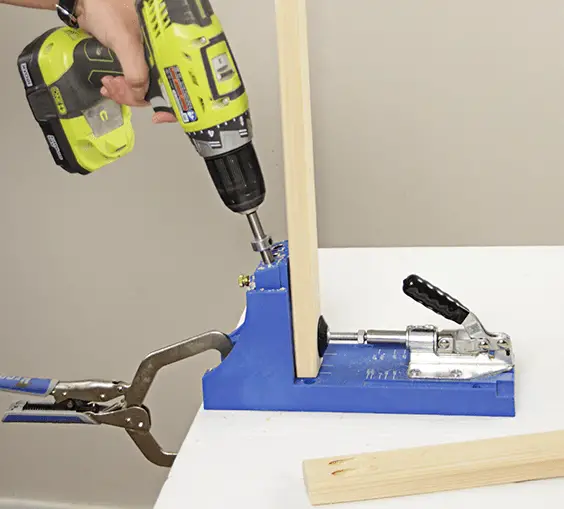
Now, at each end drill two-pocket holes. One is the 1 x 2 Apron pieces, and the other one is 1 x 2 Base End Pieces.
Step 3:
Using a drill make pocket holes into the two Apron Pieces and Shelf Supports. Make sure to align the board so that the holes fit according to its width.
Step 4:
Set all four legs side-by-side to miter their ends in the same way. Now, measure the short angled base edge, mark down the height at 4½ inches of the shelf.

Step 5:
Starting from the back-right leg, lay a scrap board of ½ x ½ as a spacer. Apply glue to each board, clamp it, and attach it by using a drill 1¼ inches pocket hole screws. Attach the opposite ends to the adjoining legs of each board.
By using a speed square, mark the perpendicular line to the edge. On the other hand, make a mark of 9½ inches inside of each leg.
Step 6:
Apply glue to secure the ends of the Apron and Base. Then clamp all of them against the inside of the legs. Position all of the pieces with the top edge.
Step 7:
Apply glue to secure the End Pieces, and clamp them one by one to the remaining Legs. Attach all the parts of pocket hole screws using 1¼ inch.
Step 8:
Place the Cleat of about the ½ x ½ inch on the backside of Shelf Support. Apply wood glue to it, and then safely secure it by using a pneumatic nail gun. Place ¾ inches finish nails every 3 inches.
Step 9:
For creating the illusion that the end pieces of the Base run along the legs, center them, and nail all the blocks to the outside of each leg. Do not forget to slope the blocks to follow the leg’s angled edge.
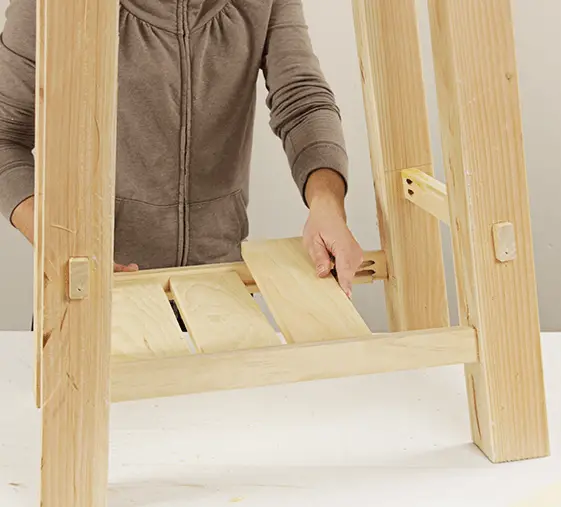
Step 10:
Now it’s time to add shelf slats. For this purpose, apply glue to the cleat’s top of each ½ x ½ inches. Set the middle Slats on the Cleats, and then the remaining shelf slates with ½-inch space between them.
Step 11:
Now assemble the center of the tabletop, drill pocket holes into the ends and edges of the underneath tabletop according to the diagram. Apply glue to join the edges of the boards and make pocket hole screws of 1¼-inches with a grill to assemble the boards.
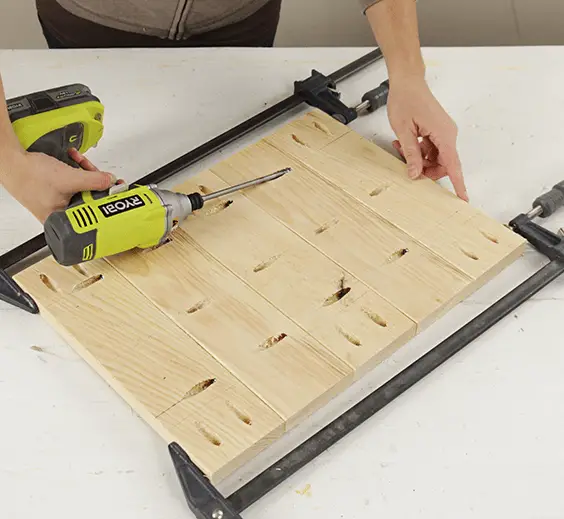
Step 12:
Apply glue to the assembled board ends. Place the longer boards opposite the ends of the assembled boards, and clamp them. With a drill make pocket hole screws 1¼-inches, now, secure these boards in their place.
Step 13:
At this point, we need to mark the length of boards alongside our assembled Tabletop. This miter cut mark will be of the 45-degree. Now set all the remaining boards on the miter saw to cut at 45-degrees.
Step 14:
Apply glue to the assembled Tabletop’s outer edge and all the cut ends of Trimmed Boards. With a pneumatic nail gun nail down the Trim and all edges of the Tabletop to protect the Trim in their place.
Step 15:
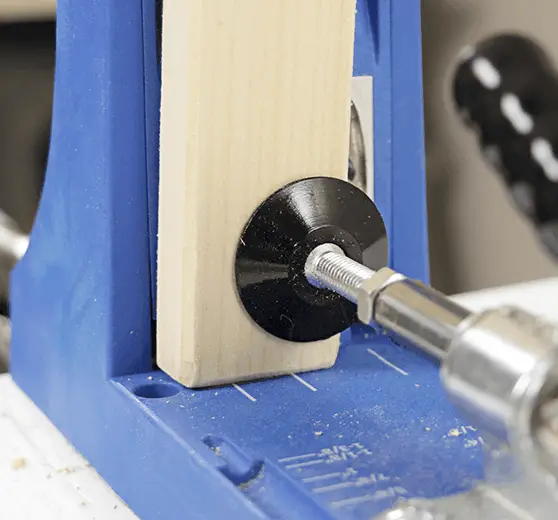
As the Tabletop is made from multiple slats of wood, so here you can use Fasteners that allow the Tabletop boards to contract and expand. For this purpose, first, you should mark the place of each fastener. Mark the outline of half of these fasteners on the top of the board.
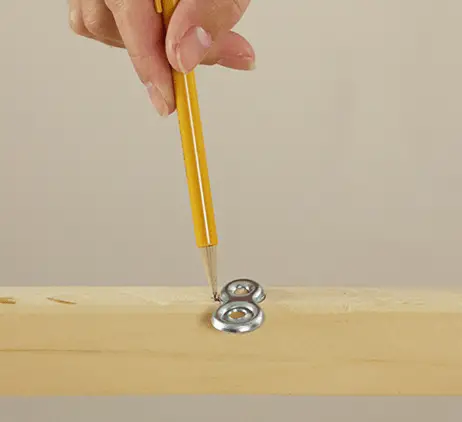
Step 16:
For allowing fasteners to set with the surface, drill a shallow inlay according to the same width of the outline we marked in the previous step.
Step 17:
Place each fastener into the inlay hole to set its surface flush with the Apron Board’s surface. By using a drill and wood screws of 1¼-inches, locked the fastener to its Apron.
Step 18:
The last step of this process is to secure the base of the tabletop. Place the Base. Screw each fastener into the tabletop wood screws ½-inches to permanently secure our DIY the tabletop.
DIY side table plans FAQs
1. How do I make a farmhouse end table?
You can easily make a simple and low budgeted farmhouse table by following the steps of the DIY farmhouse end table. For achieving the perfect farmhouse look, you should use two paint colors. A simple repaint can easily turn an ugly and old side table into an adorable one.
2. How do you make a tall side table?
It’s a simple project of raising your table. You just need the right tools. You can add feet, lifts, or extensions under your table legs to make it taller. Moreover, you can also replace the entire table legs to get the height according to your wants.
3. How do I make my end table look rustic?
If you want to give a rustic look to your DIY end table, it’s super easy and affordable. Just repaint your old table and make some new adjustments to change the look of the table.
Conclusion
All the above DIY side table plans are quite easy, fascinating, and budget-friendly. If you are looking for different style inspirations or you want to be more creative, here are the DIY plans available so you can choose wisely according to your skills. These are quick and fun to build ideas that help you create wonderful side table addition to your room and home decor.
If you are on a tight budget and do not have money to spend on a new table, you should not miss these DIY projects. You would love to see the results and it will add a pleasant touch to your home.
Alina Miles
Wednesday 12th of April 2023
Hello!
I found your site (remodelormove.com) from SERP and found it extremely awesome! I wanted to know if you accept paid content in the form of guest posts and give a do-follow link to our client's site.
Kindly let me know the price per post (if you are interested to sell sponsored posts on your blog).
Also, we might be interested in placing in-content text links (link from an existing blog post) please do let me know the price per text link placement as well.
So tell me the prices, and we’ll get an agreement ☺
Have a nice day!
Regards,