It is very simple to slap a layer of white paint on your roof and think of it as done. Yet, to truly arrange a room, it should be stunningly finished off, and putting an impact on the roof is an incredible method to add effect to your stylistic layout. Finished roofs consummately disguise defects like breaks or proof of water damage.
While deciding to bring something new to the look of the house, a lot of ideas come into mind. Some are rejected for being too expensive while others are ignored for being excessively colorful.
In such a situation, a few ideas are left which end up being difficult to execute. The latest trend to decorate the walls is that of stomping. Stomping the walls comes quite an easy, reliable, and cost-effective method. If you are looking forward to changing the outlook of a boring wall without going over the top, this is what you need.
By now, your major concern would be how to stomp texture a ceiling. If this is so, do not worry.
Reading this article thoroughly will let you know how easy it is actually to stomp the walls.
Materials and Tools Used for Stomping
Some of the major materials you may need in order to stomp the wall yourself are not only cheap but also easily available. Even if you are wondering how to how to repair a stomped ceiling, the same material will be used in that process as well.
Tarp
The most important item you need to have while stomping the wall is a Tarp. It is a piece of cloth, which works on waterproof canvas quite well.
Drywall Compound
Next, you need to get your hands on a drywall compound. Whenever you have an option, choose this material over a Joint compound. The benefit it gives over the other is the extremely smooth finish which is long-lasting and pleasant for the eyes.
Masking Tape
You need masking tape for your wall stomping procedure to go well. Masking tape is easily available in the market and makes the stomp last longer. Also known as painter’s tape, it is quite easy to tear off. The adhesive is sensitive to pressure, thus, it’s the best bet for stomping the walls. If you are contemplating how to stomp texture a ceiling, buy this product ASAP and it will make your procedure easier.
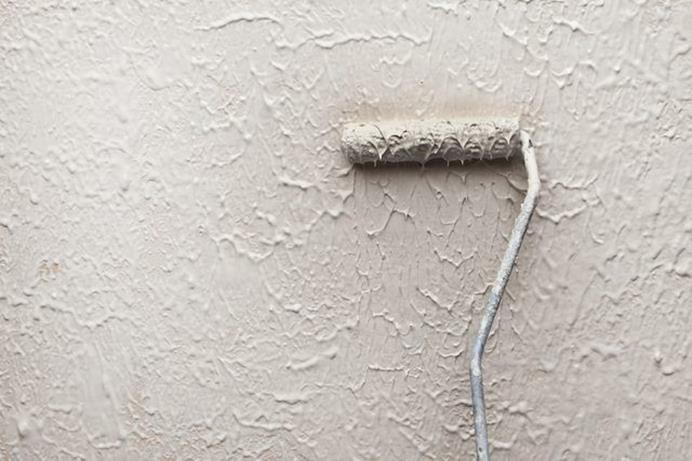
Paint Roller
A paint roller is yet another easily available product you would require to stomp your wall. Why do you need a paint roller is because it makes the process of painting the wall quite easy and agile. Compared to the regular paintbrush, this roller will make things efficient for you.
Fine-Grit Sandpaper
The Fine-grit sandpaper is something you would have to use between the coatings of paints or varnish, whatever you are going for. Though you need to put in some extra effort, it would make your outlook extremely elegant.
Air Hose
While stomping the wall, you may need an air hose to make sure the air is under the right amount of pressure. You can connect it to any equipment. However, make sure it is long enough to cater to your needs of the wall, you want to stomp.
Taping Knife
Another extremely useful tool you can make use of while stomping the wall is a taping knife. This comes with quite a wide blade to spread the mud equally across the surface. All the nails you have installed on the wall, this taping knife spreads the paint or mud quite efficiently. It comes with an abundance of usages, and you can apply it even on fiberglass as well.
What Are The Popular Stomp Ways?
The process of stomping the wall is not as difficult as you may have considered. Alongside this, there are a number of ways to stomp a wall, and you can choose one of them according to your convenience. Some methods require extra time and effort, others are more efficient as well as cost-effective. You can easily choose the method that suits you conveniently.
The process of stomping the wall basically involves in creating a texture on the wall with the help of different brushes. Now according to your convenience or requirement, you can either opt for a simple and basic design or go for something unconventional. Whatever you choose will have a different form and method of composition. The texture depends completely on the prerogative of the owner.
Splatter Knockdown
If you are contemplating how to stomp a ceiling, one pattern you can opt for quite easier is, splatter. It is one of the most famous patterns. However, this way you will have to put some extra effort into texturing your ceiling. The result, however, would turn out to be phenomenal. The installation process would be a bit longer; you have to put up two coats of the primer. Once you are done, the texturing material can be applied to it.
Popcorn Texture
This popcorn texture is also quite popular among unconventional design lovers. If the angles of the ceiling in your room are uneven, you will be able to cover them with it quite easily. As it is quite thick, it eventually leads to reducing all kinds of noises finding their way inside the room. Alongside this, the thickness ensures a long-lasting design, and you do not have to coat it over and over again.
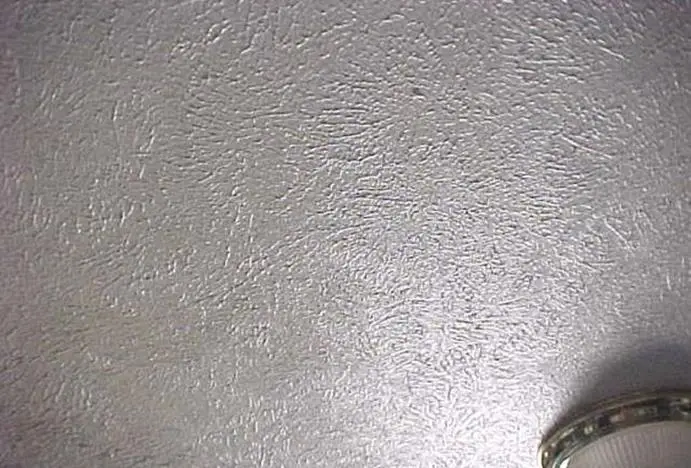
The Orange Peel Texture
Once you are done with the procedure of stomping the wall, it will look like an orange peel. This kind of stomping comes with a heavy, bumpy surface. However, in order to ensure all the peels stay in the place, they are formed; there is a need to paint the ceiling right after spraying it. This will keep the ceiling in its new design for a very long time.
How to Stomp With Steps and Tips?
In case the question of how to stomp texture a ceiling still giving you sleepless nights, this segment will remove all your confusions and anxieties. You will learn about all the steps that go into the stomping of the ceilings. Alongside them, you will also be given some tips you should follow to make this procedure a lot easier, efficient and the end results to be long-lasting for you.
Where a lot of people prefer to get this done by some professional, others opt to consider it as a fun DO-IT-YOURSELF. They get their family members motivated to perform this activity themselves and end up being successful.
The reason why stomping the ceiling becomes necessary at times is because of the dirt and imperfections accumulated on it over-time. The ceiling ends up looking extremely dirty and filthy, and there is no choice other than transforming it to look better. Stomping also hides all the uneven spaces of the ceiling, which is not possible to hide through paint.
Once you stomp the wall, there is no need to put extra effort or money into repairing the ceiling. Your ceiling turns into something completely new in lesser money and time.
Choosing the Right Type Of Mud
The first step you need to follow is to choose the right type of mud. This step can either make or break the entire process for you. The type of mud you choose should be in accordance with the design you want to opt for. It should have enough gluey property to stick to the ceiling for the longest possible time. Alongside this, the consistency of the mud you choose should also be convenient enough according to your selected design. While mixing it with water, make sure to keep it thick, just the way you want the design to look on the ceiling.
Making The Right Kind Of Consistency Of The Mud:
The next step involved mixing the mud with some water to make it perfect for the required design. If you want to make sure the mud is thin enough for the ceiling texture or not, you can use the drywall paddle by spinning it in the mud. You may use the spade handle as well if you have that as it would tell you the right consistency.
If you are wondering how to repair a stomped ceiling, you simply have to apply the same kind of consistency of mud over it. Make sure to remember the consistency when you make it for the first time. It will save a lot of time for the next time.
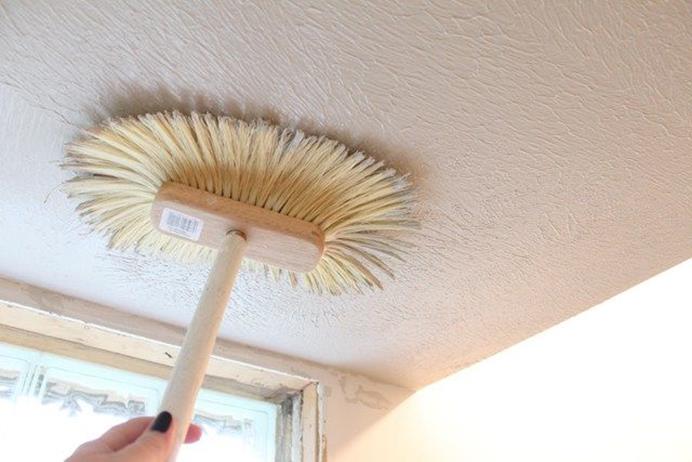
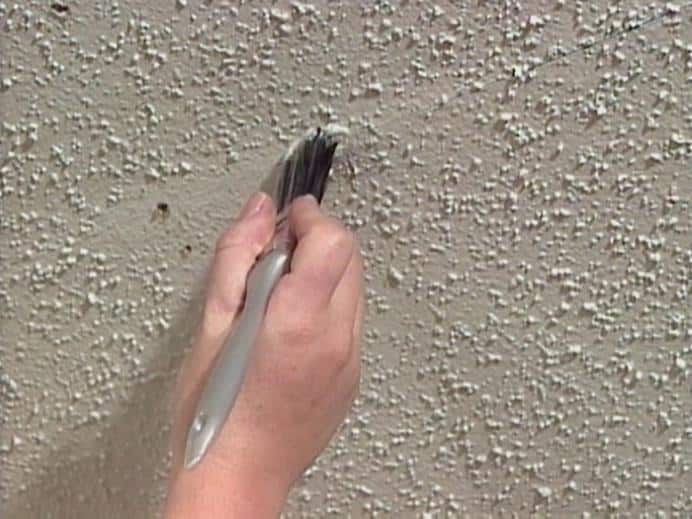
Dipping The Nylon Bristle Stomp
Now that you have achieved the right kind of consistency of mud, it is time to apply it to the place. Make sure you clean the ceiling well. Once the ceiling is ready, you need to dip the stomp on the pole into the mix. You can either use the nylon or the natural bristle stomp. If you are looking forward to an irregular style, opt for the natural bristle. Choose the nylon bristle stomp if you want a sophisticated pattern.
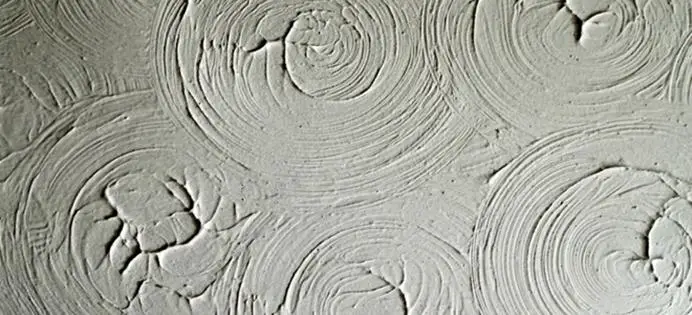
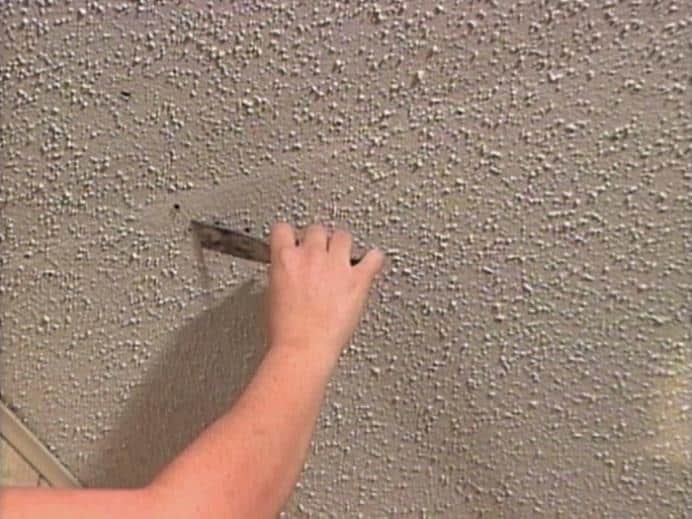
Removal Of The Mix
Once the mix has been applied, it’s time to take it off. You would need a wide taping knife for that. All you need to do is to roll it and print the design. Once you have the pattern, make a huge batch of the same pattern. This will save a lot of time. Making a huge batch that is big enough to cover the compete ceiling would be a good idea. Make sure you do not run short of the design after applying it to the half ceiling. It would cause a lot of nuisance for you.
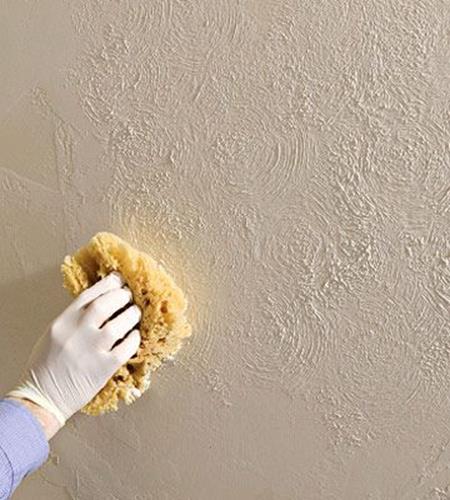
Covering The Ceiling
It is time to paint the ceiling with the design. What you need to do is to roll the mud and cover the ceiling. Once done, you would have to clean all the edges quite precisely with the help of a taping knife.
You now need to cover the damp ceiling with the design you have made. You would need to be quick to ensure the ceiling is still damp when you apply the design.
Tips And Tricks
Though the process is really easy, you need to be careful while performing various tasks. For example, if you make a small batch of the design, you may run out of it while stomping the wall. Making the same design again may lead to some inconsistency. Eventually, your ceiling would not be as good as you expected it.
Ensure, you put on the design on the damp mud. If you apply it on dried mud, adjusting the stomping design would be very difficult.
How To Maintain Stomp Ceiling!
Residue the surface week by week with either an electrostatic duster or a vacuum with a delicate brush. Never utilize grating scour brushes or brush heads, which could swamp off the surface.
Drywall compound can take on smoke and sediment stains after some time, so abstain from smoking and breaking point the recurrence of chimney fires close to the finished surfaces.
To eliminate grime and stains, soak a paint roller with an answer of one teaspoon fluid dish cleanser and four cups warm water. Delicately go over the messy areas, at that point utilize a perfect, clammy roller to eliminate cleanser arrangement buildup and make the last pass with a dry roller or delicate wipe.
Conclusion
Ceilings that are filled with dirt or have an uneven surface do not look good no matter how well you have maintained your home. The impact of your house would go zero in a micro-second.
Thus, it is necessary to give a brand-new look to the ceilings. Stomping the ceilings turns out to be one of the most effective ways to do so. If you are on a tight budget and cant repair the ceilings, stomping the ceiling would be a better idea. Also, you won’t even need to call a professional and pay some extra bucks. All you need to do is to pitch in your family members and ask them to help you. Follow all the above-elaborated steps to give a new look to the ceiling.
Now that your query of how to stomp texture a ceiling has been answered, what are you waiting for? Get on this exciting project, NOW!