Finds pleasure in creating things?
You will not miss out on a DIY mouse pad project!
A mouse pad is one of the essential accessories for any desktop computer user. On the other hand, it is super easy to make a mouse pad your heart desires. Also, customizing your mouse pad and create a unique look on your own can be very fun.
Let us learn how to do a DIY mouse pad together!
Inspiration gives us better ideas. Before we begin our work on the DIY mouse pad, it is important to review the 20 best DIY mouse pad gallery.
Get ready to be inspired!
Painted Cork Mouse Pad
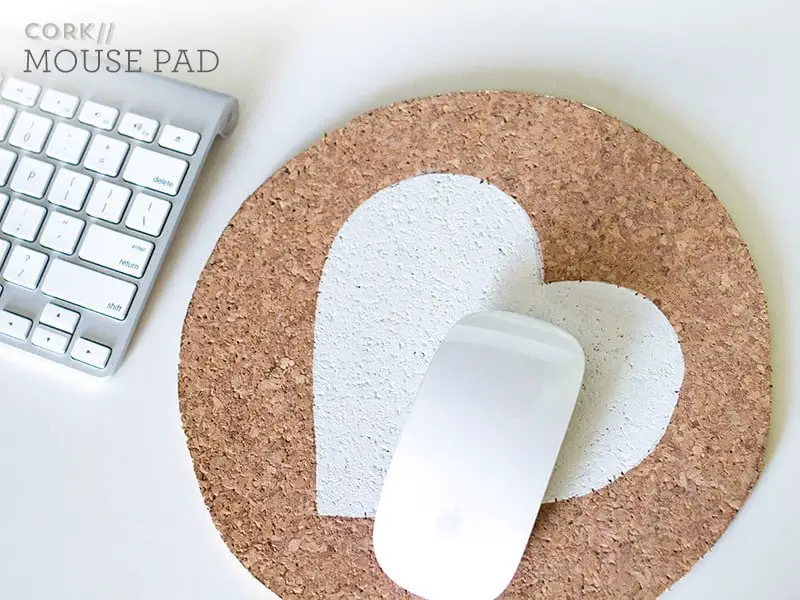
That is a lovely mouse pad made of cork. You will not believe how easy it is to make one on your own.
First, cut a piece of cork into a circle;
Second, paint it with the pattern you like.
That is all. A custom mouse pad is done!
Leather Woodgrain Mousepad
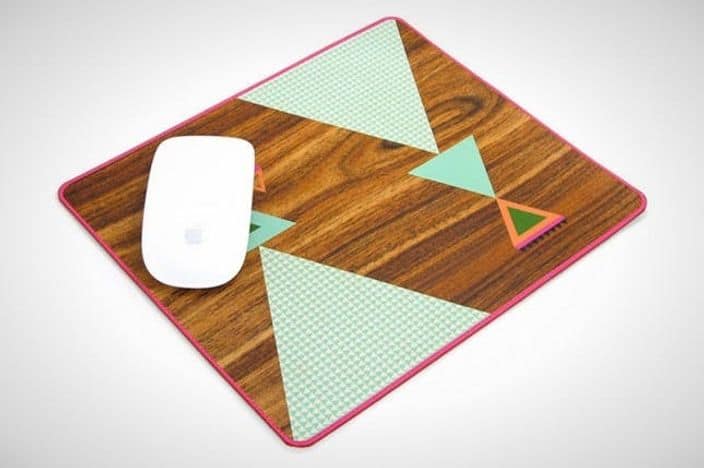
What great work! Woodgrain works so well with graph paper pattern. The neon triangles and pink border are very stylish too.
Chic Black and Gold
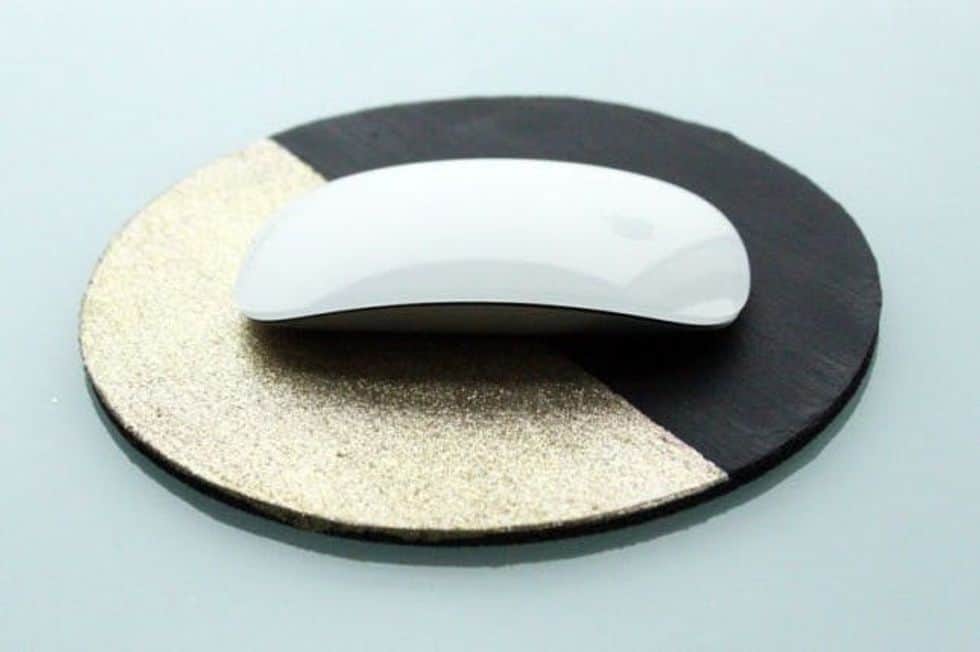
Add a simple layer of black paint and glitter can change everything. You can get a custom mouse pad in minutes.
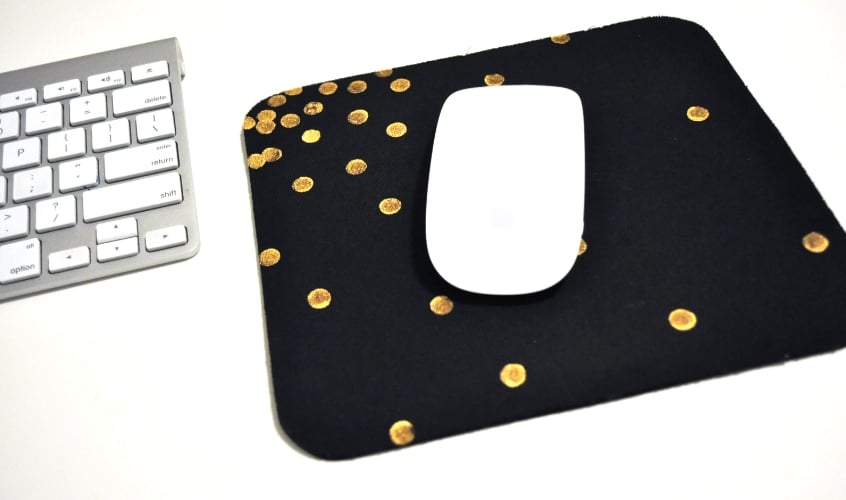
Confetti Mouse Pad
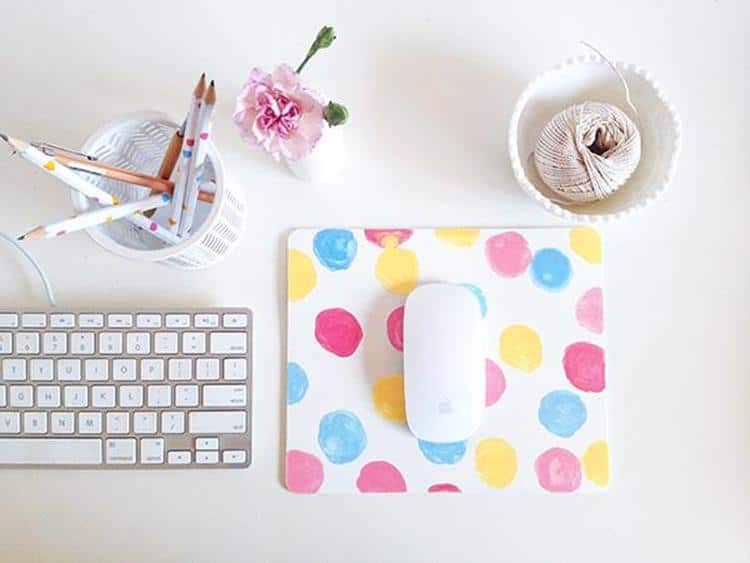
An elegantly and stylishly fashionable mouse pad. It is wise to stay simple and chic with painted watercolor dots.
Rustic Mouse Pad Makeover
Try to add the contact paper on the mouse pad. The wood grain contact paper will not wear off over time.
Just trace your mouse pad around the paper and peel off the backing. Super easy!
Monstera Leaf Fabric Mouse Pad

What a lovely DIY pattern mouse pad. It perfectly matches your rest of the“desk-decor”.
Mouse Pad for Back to School
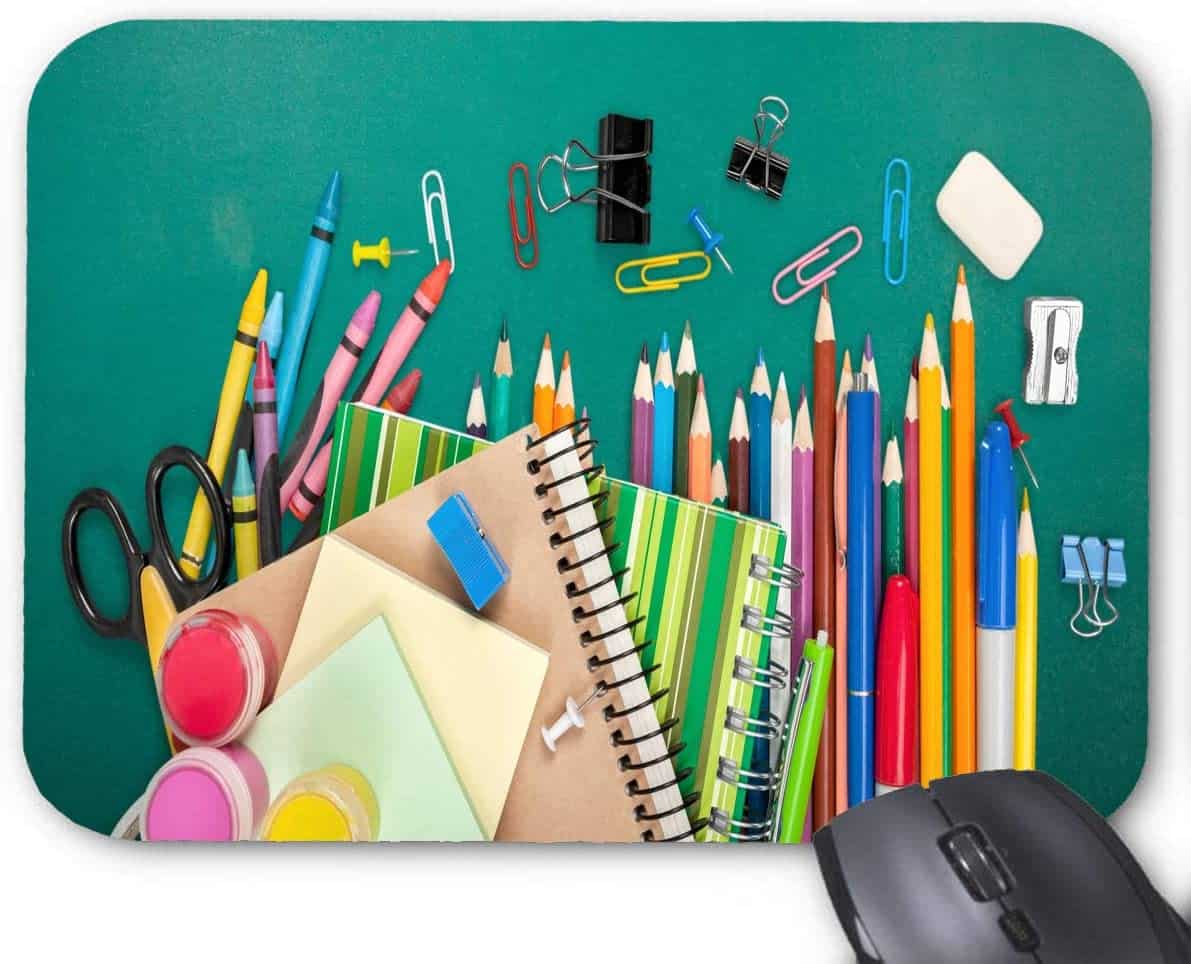
Who wants a boring mouse pad? Not the students!
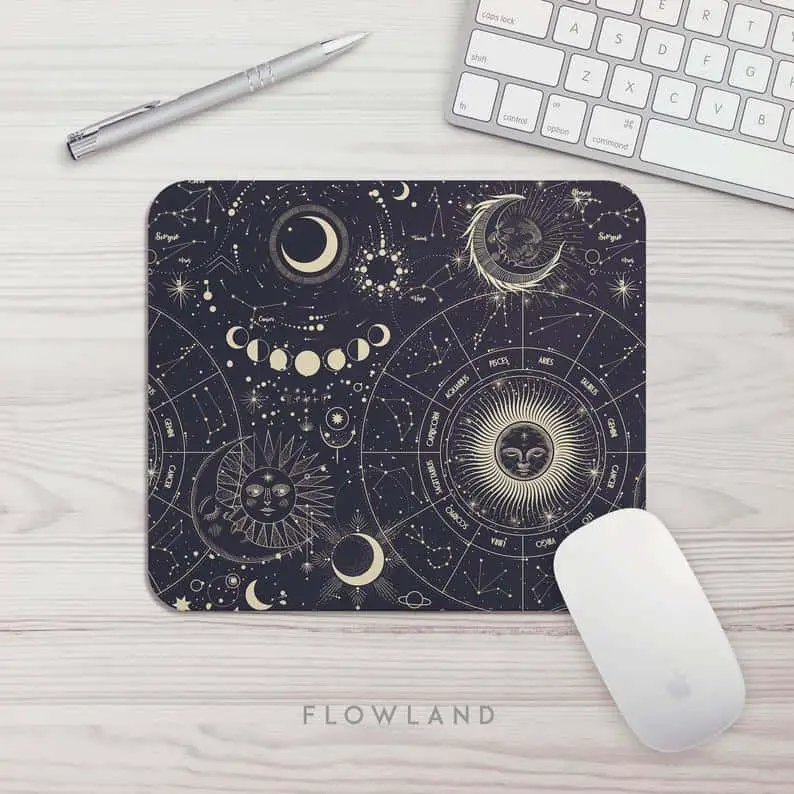
Moon Mouse Pad
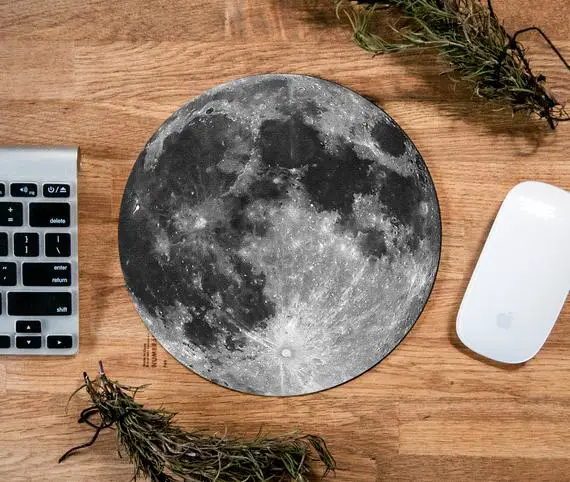
Make a mouse pad that’s out of this world. It’s the little things in life that can make you smile, like eating mooncakes.
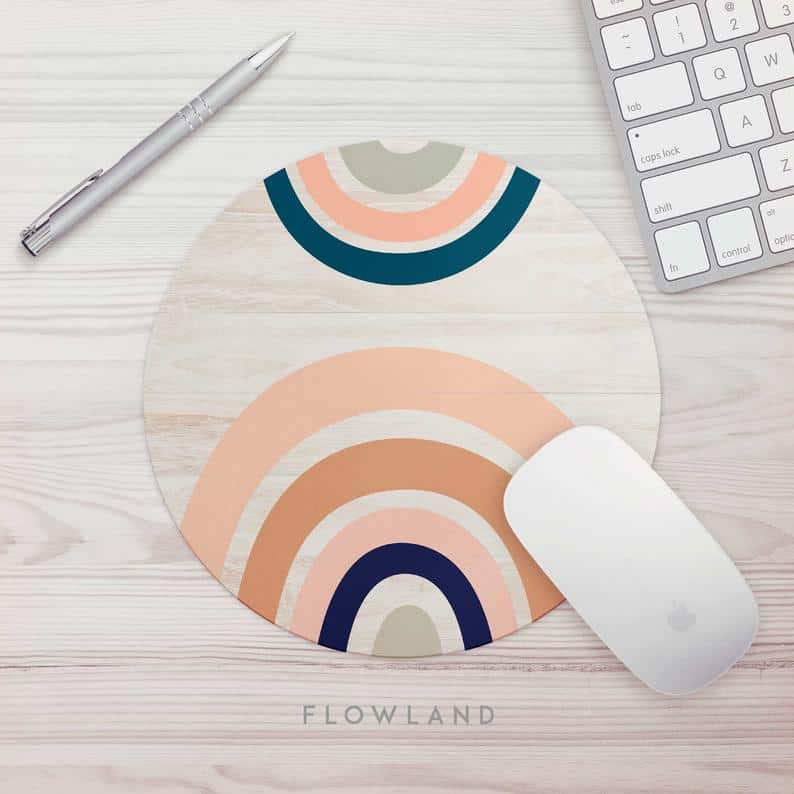
Rainbow Mouse Pad
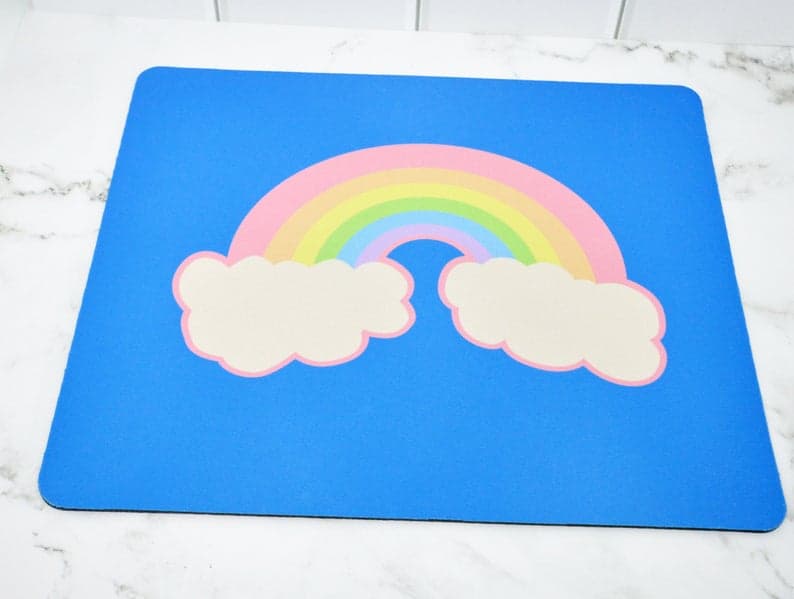
Your mouse pad can be as colorful as you make it. There are no wrong colors for a DIY rainbow mouse pad!
Polka Dot Mouse Pad
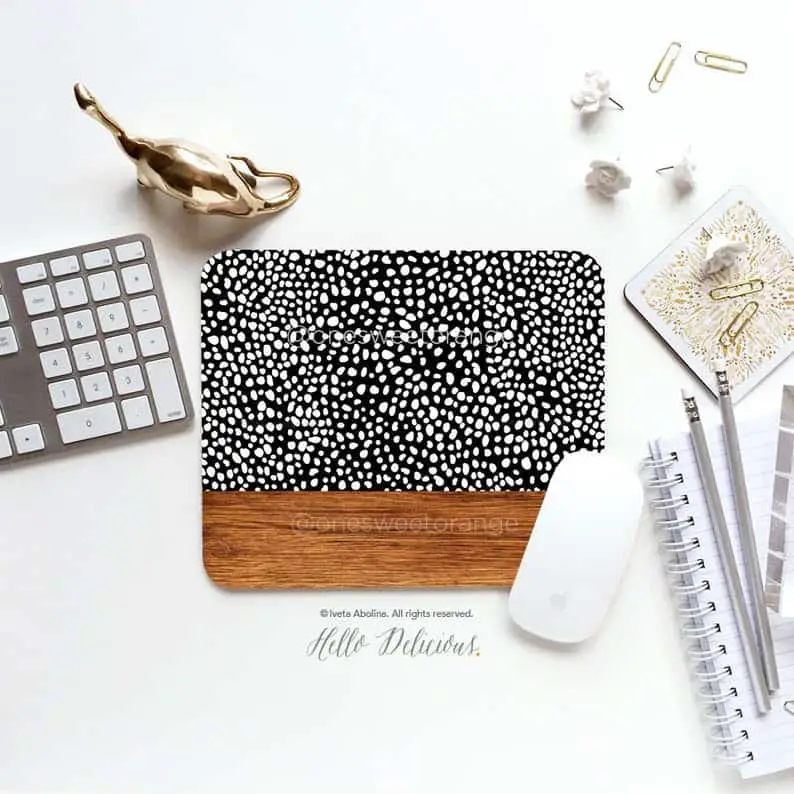
All you need is a simple cork cut into a circle and a few inexpensive supplies and you’ve got a custom, chic mouse pad!
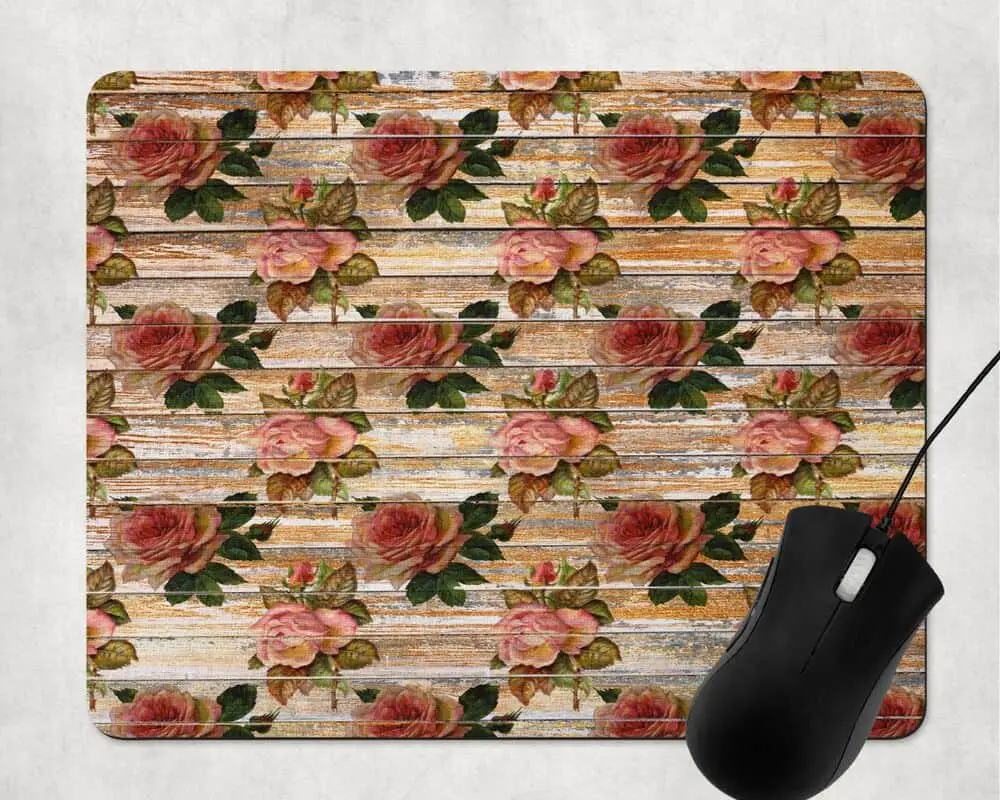
Floral Mouse Pad For Spring
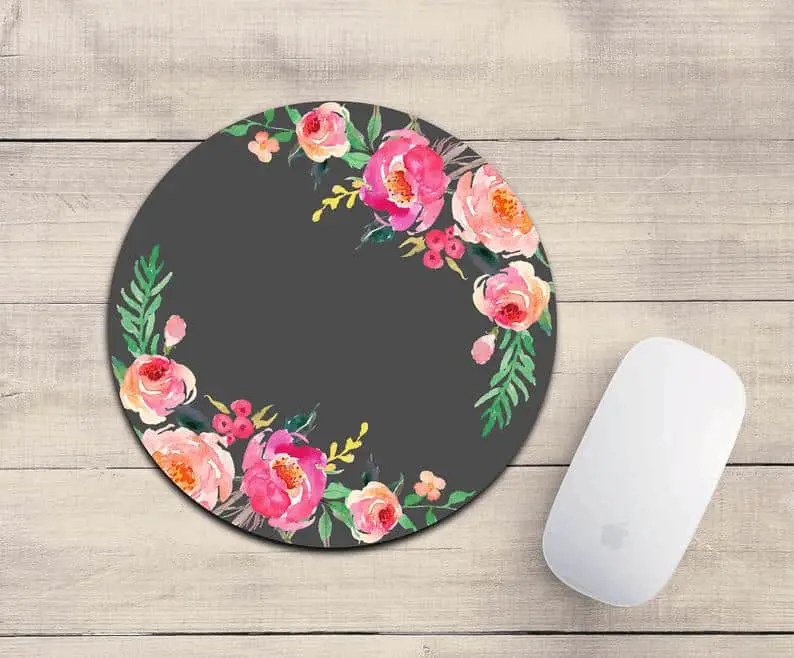
Why not keep some of those beautiful flowers on your mouse pad? This DIY project can keep the prime flower season in your office!
Office Mouse Pad
Prefers leaves to flowers? No problem. This stylish customizable mouse pad will brighten up your desk.
Round Watercolor Mouse Pad

Vibrant and beautiful. What a perfect complement to any home or office space.
World Map Rubber Mouse Pad

Other perfect accessories for your desk. Wouldn’t it be nice to see the whole world on your desk?
Mountain Mouse pad
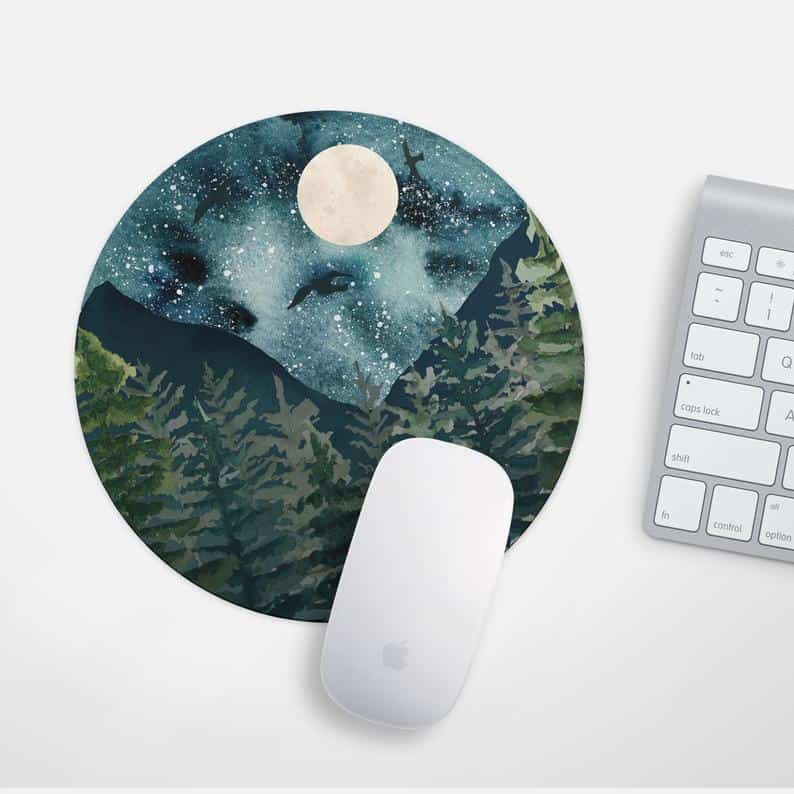
Inspired by the beautiful mountains, this DIY mouse pad can be a great addition to your desk, especially for those who love nature.
Oranges Mousepad
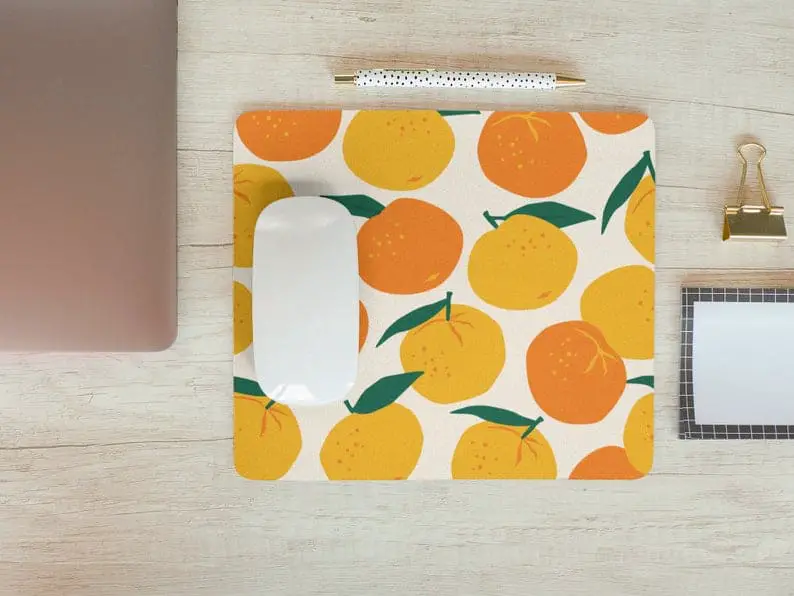
This handmade mouse pad rocks! Fruit lovers love it. These summer lemons look so fresh.
Rainbow Wood Print Mouse Pad
Surround yourself with as much sky as you can with this rainbow wood print mouse pad. It looks so wonderful!
Cat Head Mouse Pad
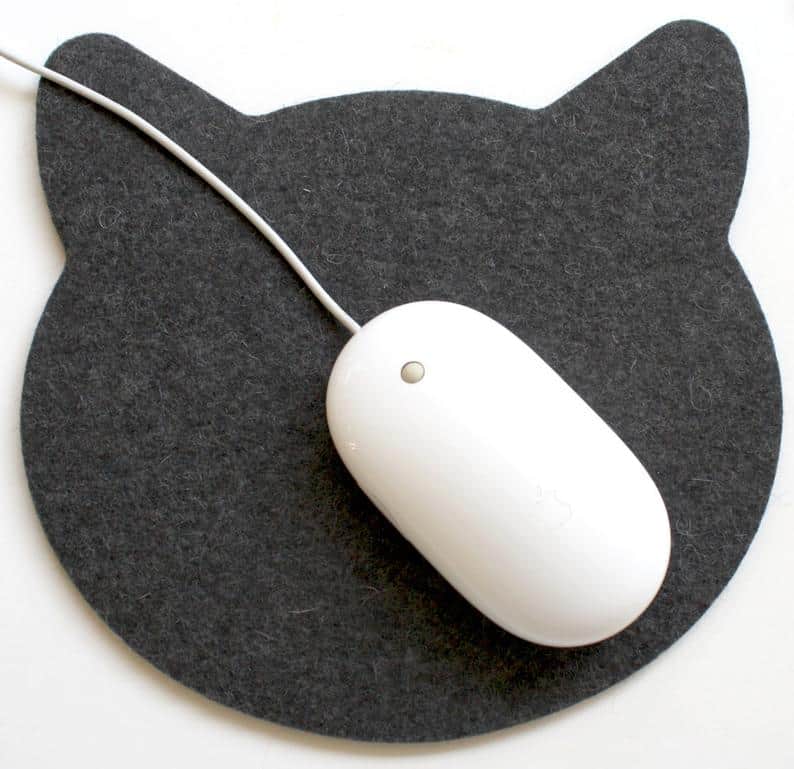
Are you a cat person? Do not miss not this cute cat head mouse pad! You will be in love with this perfect DIY mouse pad.
Grapefruit Mouse Pad
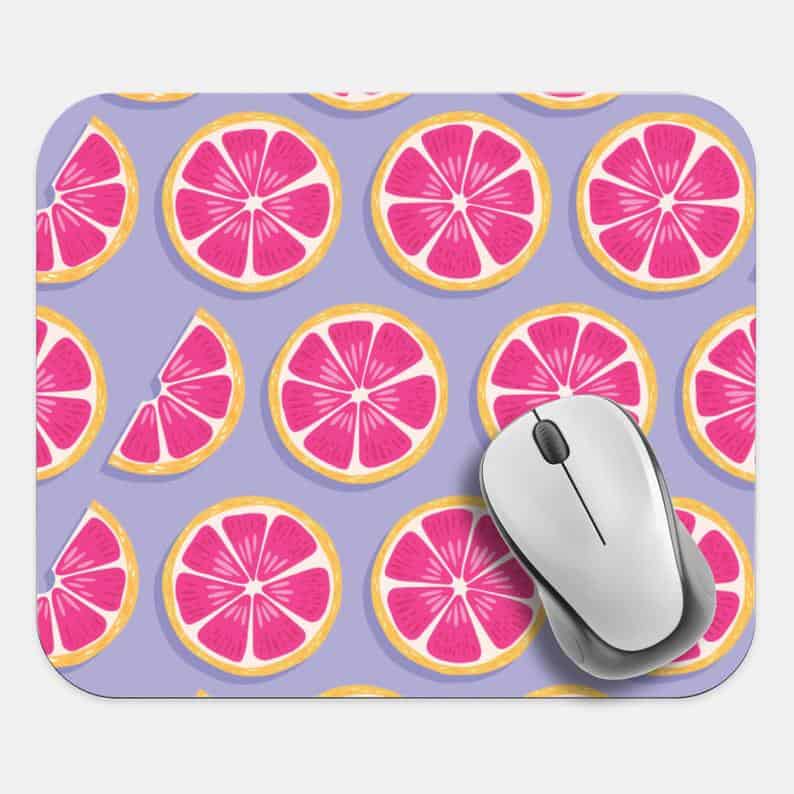
Another great item for fruit lovers. Get rid of your old boring mouse pad, this Grapefruit Mouse Pad will make your desktop so much happier.
Gold Stamped Mousepad
Love the color gold? Get yourself a gorgeous liquid gold and DIY the most unique mouse pad! The color pattern works magically when golden matches black.
What is the Best Material for a Mouse Pad?
The material matters so much when planning to do a DIY mouse pad. Good material can have better pinpoint control as well as nice aesthetics. There is some material you can use:
Paper
One of the best and budget material that works best as a mouse pad is a paper.
The advantages include:
- Easy to cut into any shapes your heart desire.
- Smooth and easy to use.
- Can be decorated anyway.
- Inexpensive and save a budget.
- No side stitching
Cloth
Cloth comes with a texture that feels very similar to a mouse pad. A cloth mouse pad that features a non-slip rubber base and stitched edges can perfectly prevent fraying. The advantages include:
- Low cost.
- Durable over time.
- Fine and rough surfaces are both ok.
Plastic
The plastic mouse pad offers a solid, hard surface. This is the best for sliding speed and low tactile resistance. The advantages include:
- Solid and subtle.
- Rapid mouse movements.
- Low friction surfaces.
- Smooth and stable.
- Variety of sizes and designs.
- Positioning is excellent.
Synthetic
Mouse pad made of rubber composites with synthetic fabrics is the classic one. The use of synthetic is popular. The advantages include:
- Easy to clean.
- Offers a dense foamy structure with a soft top.
- Smooth, consistent, and durable surface
- Pin-point control with little friction
- Variety of sizes and designs
- Positioning is excellent.
Mental
Some prefer a mental material mouse pad. Normally the mental mouse pad is aluminum-based. The advantages include:
- Smooth and durable.
- Low friction.
- Chic and stylish.
Glass
The lass material mouse pad is relatively new compared to the above materials. It is more expensive and easy to broke. There are not so many items on market yet. The advantages include:
- Smoothness is perfectly good.
- The appearance is stylish.
How to Make Mouse Pad
You will not believe how easy and quick to make your mouse pad with custom style and look.
If you are ready to DIY a mouse pad, we have even more ideas to inspire you. You can make any kind of mouse pad as you wish.
Prepare the supplies
Materials needed for DIY mouse pad usually include:
- Pencil
- Ruler
- Fabric or ribbon
- Old mouse pad or cork
- Scissors
- Sewing machine
- Round cork circle
- Scrapbook paper
- Paint
- Foam brush
Use a sample to get the shape you want
When making a mouse pad, you may need a custom and interesting shape. In this case, use a sample can perfectly cut a shape for you.
A corkboard can be used as a sample.
Here is how you do it. Draw as you want on the corkboard and cut it into the shape. Cut a big piece of fabric to cover the design you traced on the cork.
Then use glue to connect the fabric onto the corkboard. Trim the fabric and give it the same shape as the corkboard.
Wear an eyeglass for protection.
In the process of a DIY mouse pad, you’ll need to cut paper, punch holes, paint, and more handmade works. Wear an eyeglass can protect you from getting hurt.
Use design tools to get the pattern
If you found drawing on a small paper is hard, you can try drawing the pattern using a design tool, for example, Adobe Illustrator and Sketch.
This program has plenty of pre-built vector icons and images, you can draw and print them out for use as a pattern.
Leaving about 1 inch on each side of the cloth
Do not cut out a piece of cloth that exactly matches the shape of the mouse pad. It’s necessary to leave about 1 inch on each side.
This way you can sew it later and make the edge more smooth and beautiful.
Traced out circle and pattern on the back
Always use a pencil to trace the shape on the back of the scrapbook paper or fabric. This way you’ll never harm the beauty of the surface.
And you can also save time erasing the traces.
Be patient to wait for it to try
Be gentle to place the paper or fabric on the cork. When use glue to connect the fabric onto the corkboard. You’d better use fingers to keep any bubbles from popping up.
Don’t forget to wait 15 – 20 minutes for it to try.
Use sharp cutting tools
When DIY a mouse pad, you’ll need to use a sharp cutting knife or scissors to get clean edges.
Follow DIY mouse pad tutorials
Still, need help to DIY the mouse pad? No worries, some practical guides and tutorials show step by step on a DIY mouse pad. We have some recommendations:
- DIY Glowing Mouse Pad
- Beginner’s project to a DIY mouse pad
- DIY Mouse Pad with Scrapbook Paper
- DIY SUEDE AND GOLD LEAF POLKA DOT MOUSEPAD
- MAKE MOUSE PAD IN 10 MINUTES
- DIY confetti mouse pad
Conclusion
Creating things on your hand can be one of the happiest things in the world. DIY mouse pad is what you can do right now, so get on board and start doing it!
Whether you got an old mouse pad that needs redecorate or you are planning to DIY a mouse pad from the very beginning, you can do it.
This article is all about DIY mouse pad, and we hope it will inspire you.
