Have you noticed that your shark vacuum is losing its suction power or emits a strange odor? The reason can be due to the clogged nozzles and blocked filters. Can you remember when you last cleaned it? There is a good chance that the gadget needs cleaning.
How to clean a shark vacuum? It is not anything complicated. You don’t have to be a DIYer to do it. Even without experience, you can still do it. That will be the focus of this post. We will walk you through the steps of cleaning your shark vacuum for effective cleaning.
How Often Should I Clean a Shark Vacuum and Filters?
Before we dive deeper into the topic, let’s answer this common question. How often you should clean your shark vacuum depends mainly on how frequently you use it. Let’s take a scenario of regular use.
It’s recommended that you empty the dirt chamber after each use to prepare it for the next task. According to the manufacturer’s manual, you should clean the foam or felt filter every month. Also, shark vacuum should undergo a thorough cleaning every three months of use.
During the quarterly cleaning, you should disassemble the shark vacuum to clean its various components, as we will describe shortly. The HEPA filter should be cleaned at least once a year.
Regularly cleaning your shark vacuum is necessary for its efficient operation. It will experience some glitches or hitches when neglected, as you should have noticed.
How Do You Know Your Shark Vacuum Requires Cleaning?
The time frames mentioned are according to the manufacturer’s recommendations. However, you should clean the shark vacuum when necessary. You may be required to do it more or less often, depending on the usage. So, how do you know that it needs cleaning?
There are visible signs that clearly indicate you should clean a shark vacuum. The following are the most common ones:
Loss of Suction Power
The vacuum can be clogged by dirt, such as balls of hair that eventually block it. With loss or reduction of suction power, there is a high chance that you need to clean it. There may be other causes of this, but the most likely one is a blockage in the vacuum.
Reduced Reliability
Shark vacuum cleaners are reliable and pick every dirt on the floor when new. If clogged or requires cleaning, it will visibly leave behind these dust particles and pet hairs. We don’t imply that it is the only reason, but your first troubleshooting is cleaning.
Produces Unfamiliar Noise
Shark vacuum cleaners are designed to operate smoothly. If there is a sign of struggle or the production of weird sounds, then it may be time to take it apart and clean the internal components. Straining it will have adverse effects on the motor, most likely reducing its service life.
Foul Smell
Sharks should never produce any unpleasant scent or odor. If that is not the case, then you can consider cleaning it. The smell may be coming from the dirt trapped inside.
How to Clean a Shark Vacuum
You can perform regular cleaning as described in the user manual or launch it when called for. That should be done to maintain the reliability and efficiency of the shark vacuum. But how do you go about it?
Regardless of the product model you own, the cleaning procedure basically remains unchanged. Keep reading to learn how to safely clean your shark vacuum cleaner.
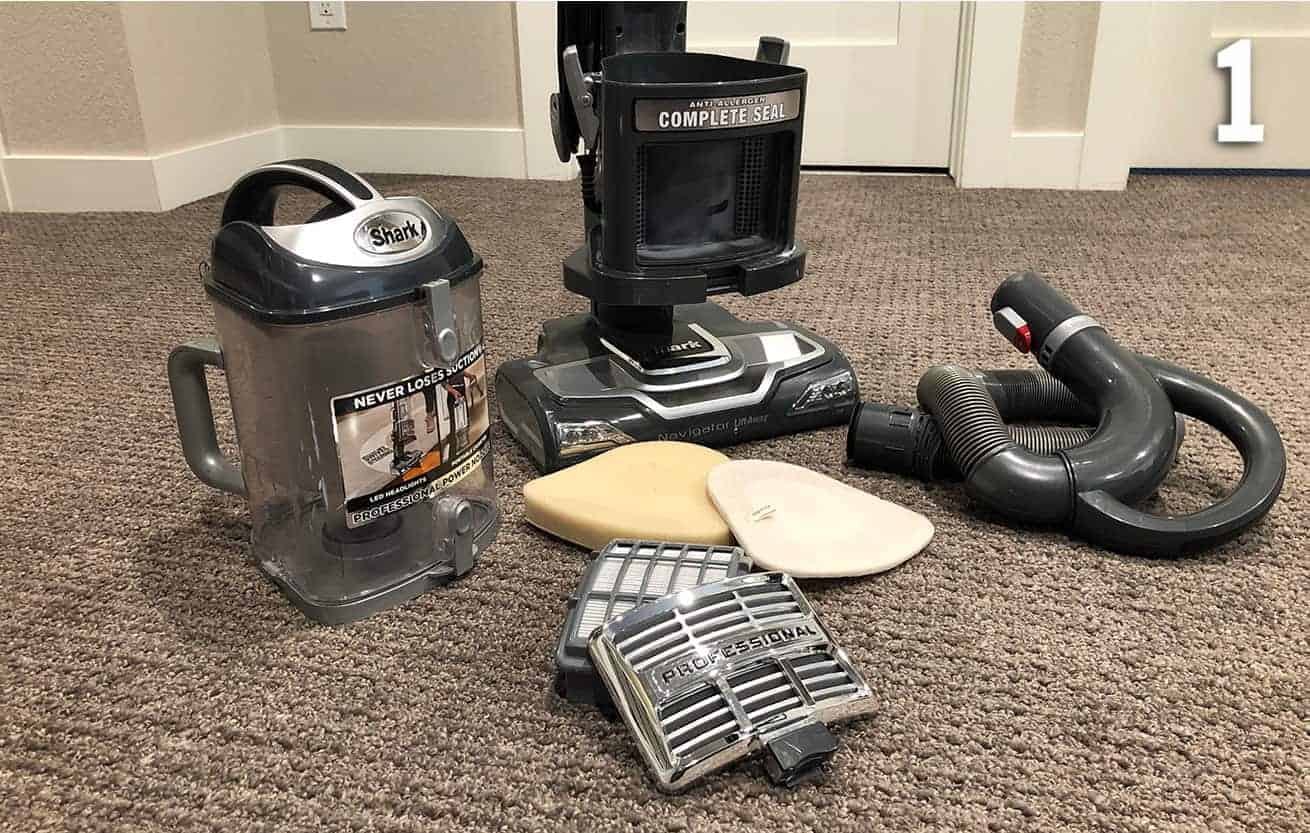
First, gather all the items, gears, tools, and equipment, which include the following:
- Warm water
- Dishwashing liquid or a solution of vinegar and baking soda
- Microfiber cloth for cleaning
- Wood skewer, or similar
- Flashlight
- Soft brush like a bottle brush
- A pair of scissors
- Rubber hand gloves
With everything ready, you are all set to clean your shark vacuum. There are just 7 steps involved, and you will have it running as new.
Steps for Cleaning Shark Vacuum
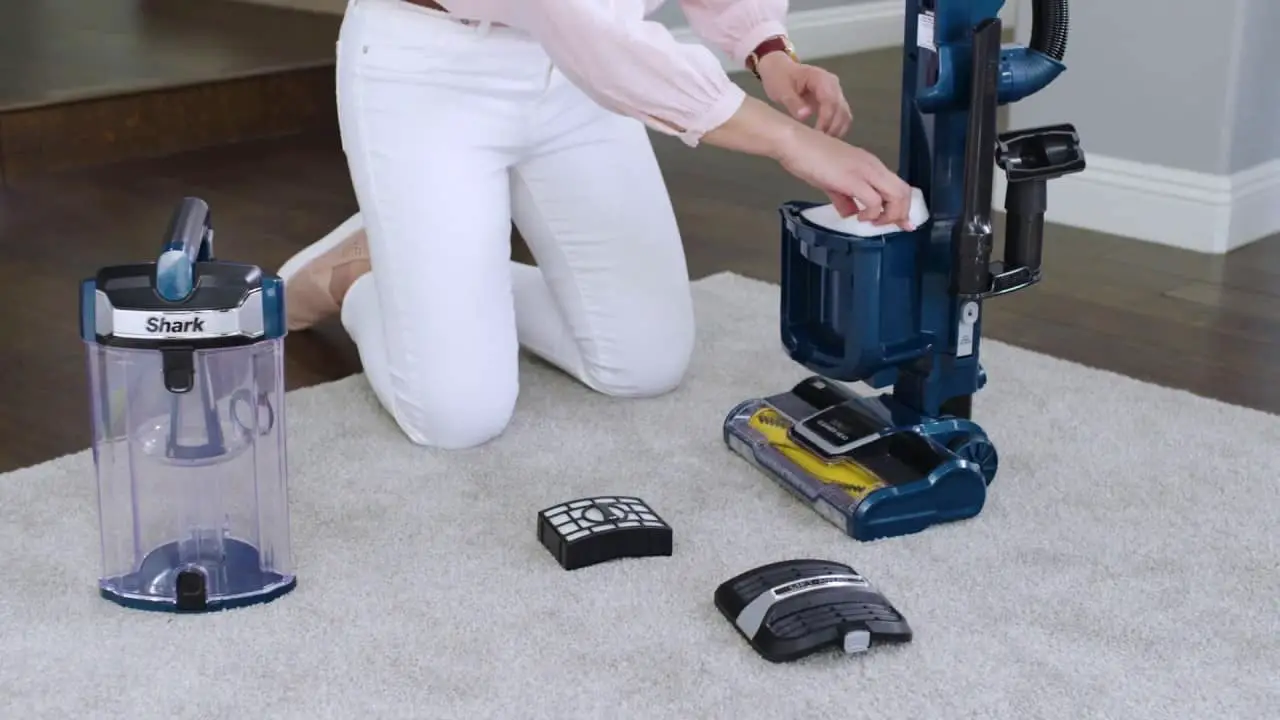
1. Disassemble the Shark Vacuum Cleaner
Put on your hand gloves and disconnect electrical power to the gadget before dismantling it. That is done for safety reasons. And as a reminder, never open any electrical device when still plugged into the receptacle, not unless you know what you are doing.
Dias assembling the shark filters involve removing screws and detaching wires to take various components apart. Take out the dust container, HEPA filter, and foam filters while observing how they are arranged for easier reassembling after the cleaning process.
2. Clear Any Blockages
Check every air passage and clean every dirt you see. These are usually accumulated dust particles and hairballs. Strangely, some people have even found socks and other large objects. So, don’t be surprised if the face towel you have been missing for months is among the dirt blocking the air passages.
Use your hands to remove large and easy-to-reach dirt. Wipe all dust particles with a microfiber cloth. You can use anything that will make you reach the hidden sections, provided you clean everything.
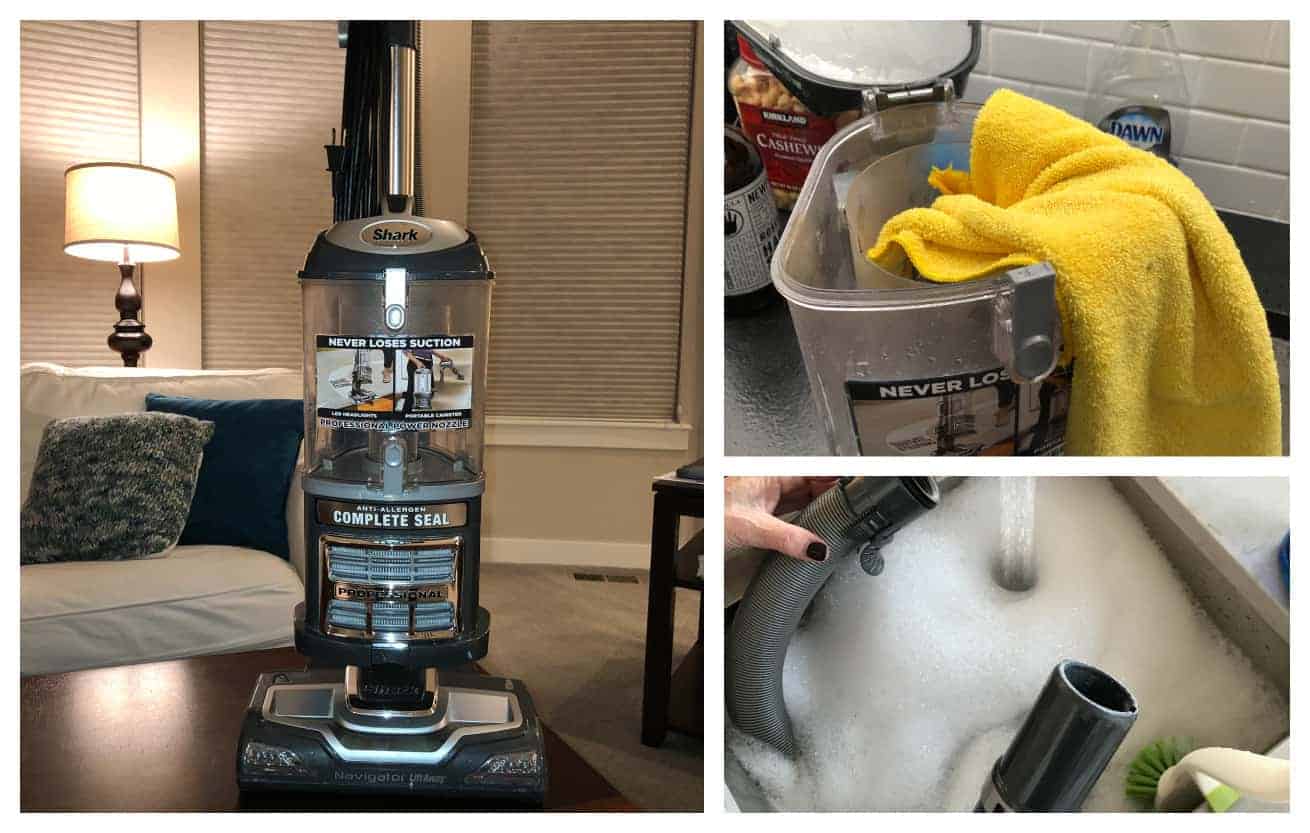
3. Empty and Thoroughly Clean the Dirt Container
Apart from the recommended daily cleaning of the dirt container, this is the prime opportunity for doing it with soap and water. After emptying the solid dirt into the dust bin, head to a sink and do a good job. Use a brush to clean the insides and wipe dry with a clean microfiber cloth.
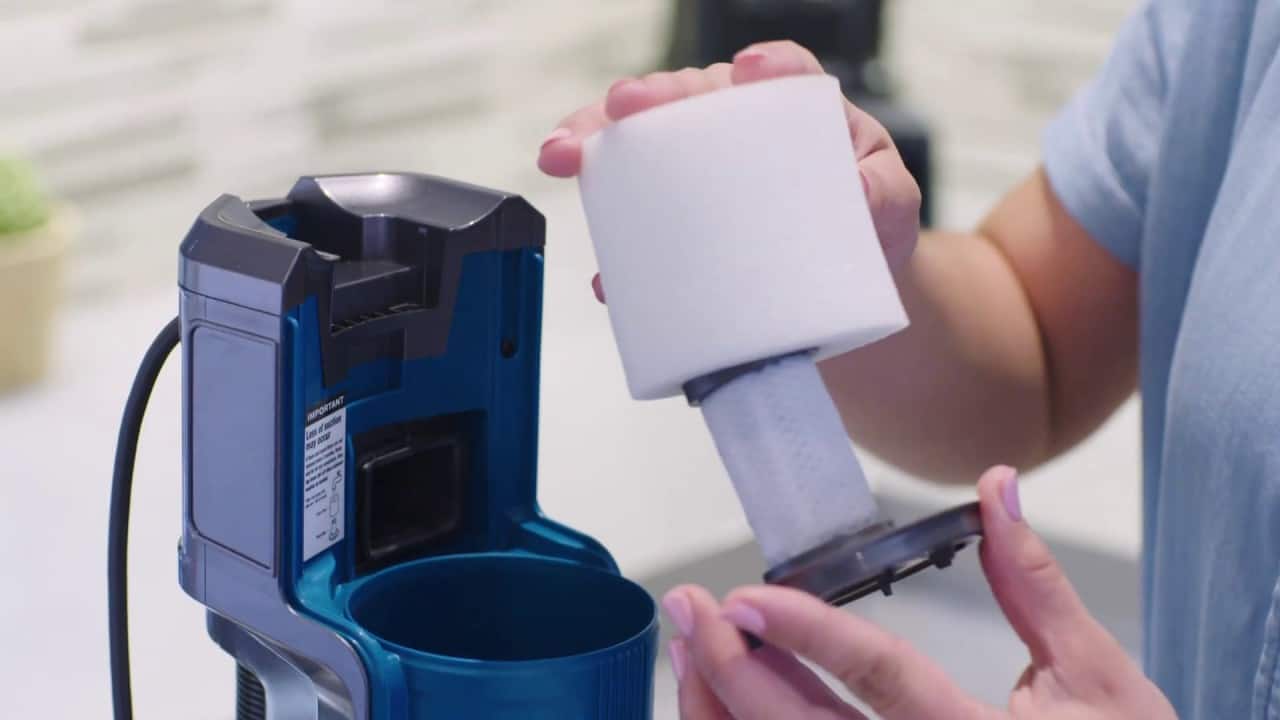
4. Clean All the Filters
Shark vacuum has many filters, and this is the time to clean all of them. This brand mostly has two filters, but you can find some models with just one. Start by either foam filter or HEPA filter in any order.
For a foam filter, rinse it in clear water. Avoid soaps when cleaning filters, and you should also be careful not to damage them. However, if they are visibly damaged, then you may require a replacement. A clean foam filter is white in color. Find more information on the manufacturer’s website.
HEPA filters on a two-filter shark vacuum model are located on the lower section just behind the door. Start by removing the door to give you room to pull out the HEPA filter. Clean it using clean water with no soap and ensure it is dry before returning it back. Please note that HEPA filters may require up to 12 hours to dry. So, leaving them on the counter overnight may be the best approach.
5. Clean the Head
Lay the shark vacuum upside down on the floor to reveal the rotating head. This part is likely to have debris and all kinds of dirt stuck on it. You may consider spreading a piece of paper or cloth on the floor to catch everything that you will be brushing off the rotating head. Use your pair of scissors to cut anything that’s wrapped around this head. And like all other parts, you also need to brush and wipe it clean.
6. Clean the Handle Hose
The step requires caution because it may contain electrical wires in some shark vacuum models. Remove it carefully if it doesn’t have any cords and clean out all that dust and grime. You can use a brush or rug to ensure all parts are spotlessly clean.
Dust and grime in the handle hose may be sticky and hard to remove. So, soaking it in water for some time can help loosen the dirt particles. Add soap to make the process more efficient. Once you are through with the cleaning, hang the handle hose somewhere to drip dry.
7. Reassemble your Shark Vacuum
Before reassembling, you need to again check every part that you have cleaned for any water molecules. After confirming that every component is dry, assemble everything and screw to tightly hold them. Reassembling is done in the reverse order. That is to say, the last piece to be pulled out should be the first to go in.
How Often Should I Replace Filters on Shark Vacuum?
As mentioned, dirt accumulation is not the only cause of suction power loss in shark vacuum cleaners. Damaged filters are another reason. Even the manufacturer recommends that you should replace your filters when the gadget loses its suction power. The frequency of doing so will depend on how often you use it for cleaning.
Remove the Ring Summary
Keeping your shark vacuum cleaner is the only way to get the best out of it. Ensure it’s cleaned as regularly as recommended by the manufacturer or when due. Your gadget will alert you when cleaning is needed, when there is a reduction in suction power or when it leaves behind debris and pet hairs. Also, an odor or change in sound when running is since that cleaning is overdue.
Follow the steps outlined in this article to restore the reliability and efficiency of how to clean a shark vacuum. If cleaning doesn’t correct the suction power, then you may need to replace filters.
