Science and technology advanced tremendously in the last century. Now, we can get three-course meals at our doorstep with the touch of one button. We can connect to people continents away, even the ones floating outside the planet in spaceships. Now, gadgets can perform unfathomable things to our imagination. But there is one thing that still bugs humanity- clumsy webs of wires still exist! The worst part? They get tangled right when their need is heightened.
Wouldn’t it be nice if you had one fixed location where you charge everything? Added benefits include reduced screen time (yes, we are talking about the mindless scrolling on Instagram lying on the bed), easy to manage and reduced stress and frustration. We have them covered here. Heckle the hassle of wires nesting in your room(s) by DIY cable management. Read on to know how to sort your cables in fun and funky ways.
[toc]What is the advantage of this cable management?
According to the non-existent research I did throughout my frustrating experiences with wires, the tangled abyss density of long metallic threads encased in plastic is directly proportional to the urgency of using them.
“Sir, I was late for today’s online meeting because, well, I forgot to switch on the charger”. This sentence is very relatable even if none of us uses it in our lives. You have an online session at noon and in the 11th hour, you realise you have misplaced your wire cables and you cannot figure out where you placed your phone charger. Was it the bathroom? Or the side table of your bedroom? Let us not even get started with the extent to which our earphones entangle. It takes an Einstein level of concentration to straighten them before they form jalebis again in your pocket.
Apart from making the wires “invisible”, you reduce risk of injury, save space, eliminate trip hazards, protect the cables, branch of the cables, route cables in different directions, prevent overheating and save you from extensive monetary losses in the long run. Workplaces legally have to manage their cables because otherwise, they would be risking the health of their employees, creating a bad impression on the visitors and incurring money losses because of mismanagement.
The cord organiser DIYs that I am mentioning in this article do not demand special skills or appliance. They are cheap and require just some creativity and lo and behold! The mess of the cables vanish! Apart from being extremely cheap, the methods are flexible and efficient too.
What are the popular diy cable management ideas?
You would not believe how fantastically efficient and aesthetic these ideas are. Even with the advent of wireless technology, I am not able to get rid of cables in my house. So, here are the top 20 trendy ideas for DIY cable hiders that answers all the aforementioned problems.
1. Rubber cable clips with indentations
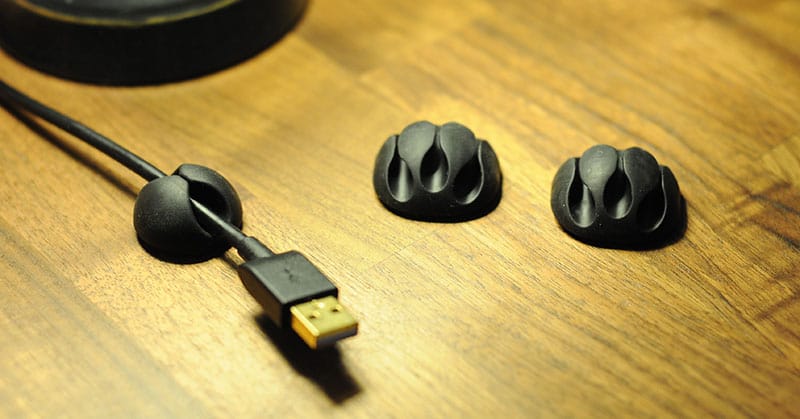
This is an amazing option if you have wires to be sorted out but need to move them, use or replace them often. This DIY cable organiser can bundle up few wires especially the ones like USB porter, AUX cables or any wires of such sort that you use frequently but usually keep hanging from your desk. These rubber cable clips are available in cute colours and designs but the only downside is that the gum would not be strong and it can hold only 3-5 wires at a time.
2. DIY bone for cable
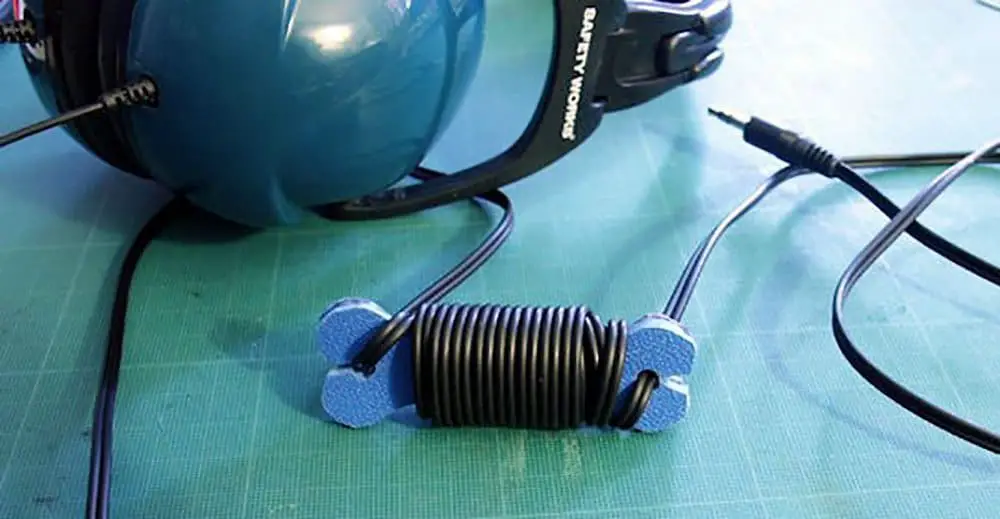
You have a myriad of long wire simply existing on your table. You need them but do not need them taking a whole lot of space. Temporarily shorten the wires using this method of DIY cable management- cable-bone. This no-cost solution requires a rubber mat or strong cardboard, pencil, cutter and glue.
Cut two bone-shaped rubber mats of adequate length (10 cm would be nice). Drill holes on both the ends and make a slit slightly so that you can insert a cable but prevent it from getting out of the hole. Wrap the cord from one end to another while you coil it along the length of the bone to shorten the wire length hanging loosely on your desk.
3. DIY shoebox cover strip
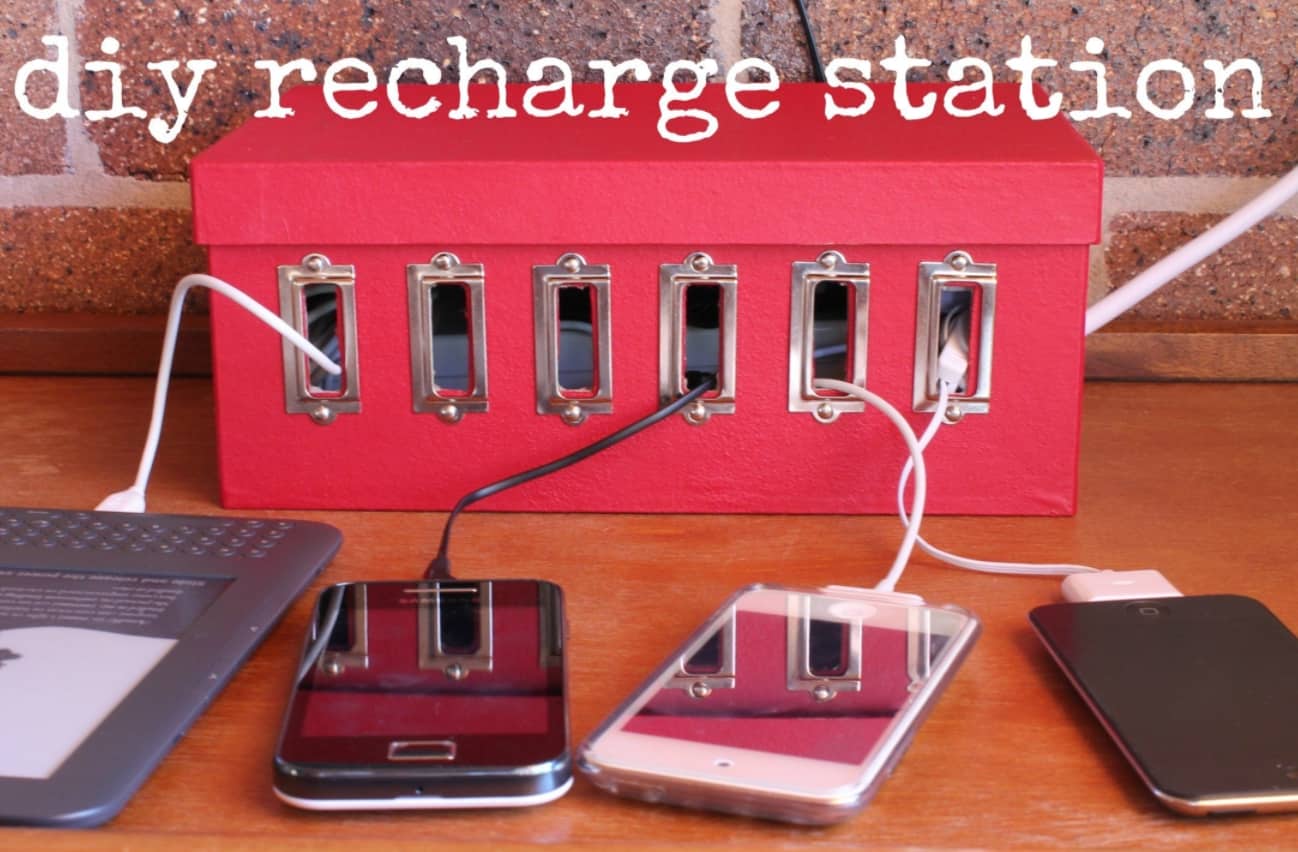
Take out your artsy pens and craftsy papers to fashion out a colourful or stylishly designed DIY cable management box for your power strip! If you are not into painting and changing the aesthetics, then no problem! Just punch 4 holes or the required number of holes of the numbers of wire attached to the power strip on one side face of the box. Cut one hole on the opposite end to connect the power strip cable. Cut more holes if you are placing more than one power strip inside the shoebox.
(Tip: If you want to go extra fancy and safe, line the holes with tape or some metal strip so that the wires will not chafe)
4. Velcro it!
Instead of drilling the power bar under your desk, you can attach Velcro strips to the power bar and the desk or wherever you want it. Drill the Velcro strips using screws or stick it with strong glue to the surface of your preference. Et Voila! You have instantly reorganised your cables using a DIY under desk cable management technique!
5. Toilet paper stand
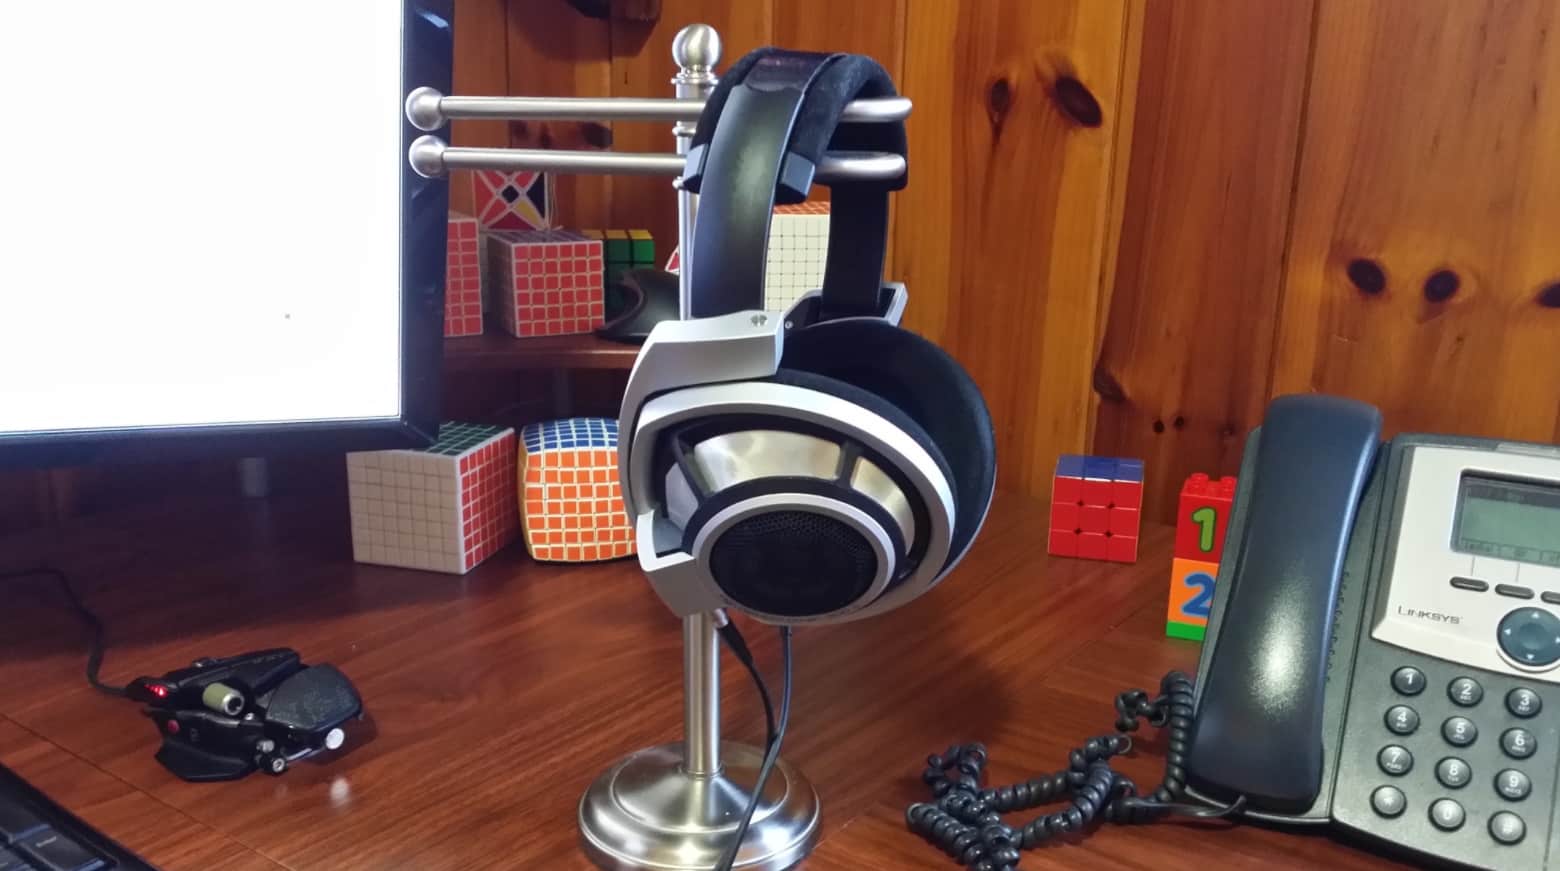
The toilet paper stand or hanger is a useful tool to hang your earphones and headsets. The best part about them I that they come in very good quality for a cheaper rate.
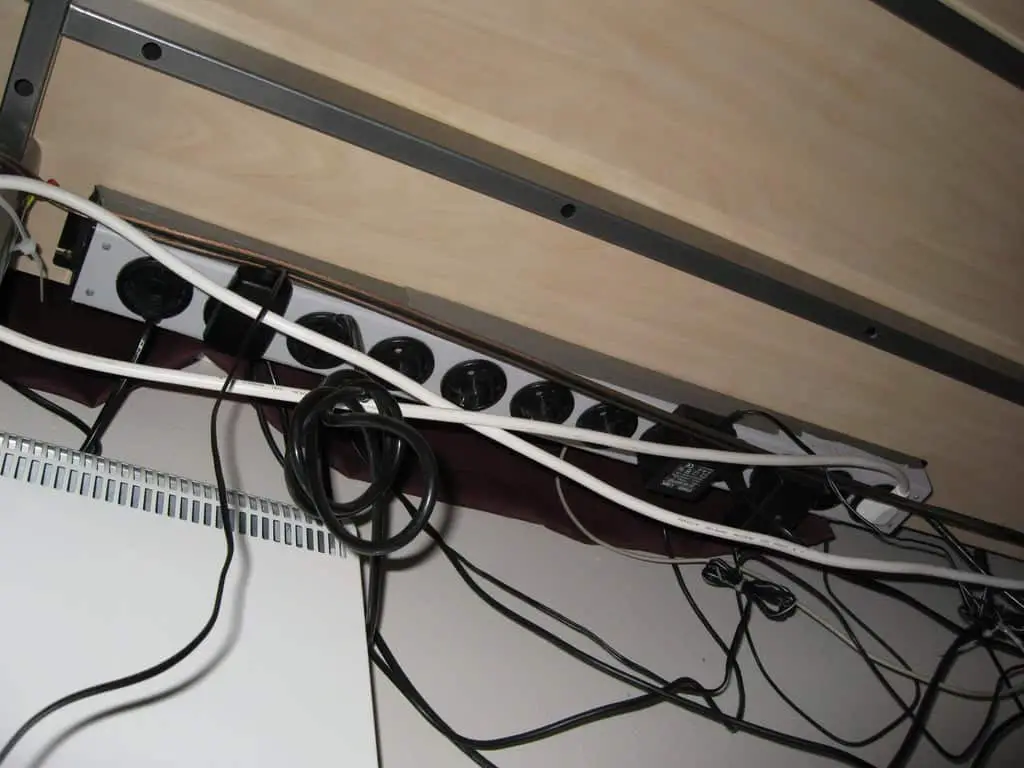
6. Hide in plain sight using wire-mould raceway
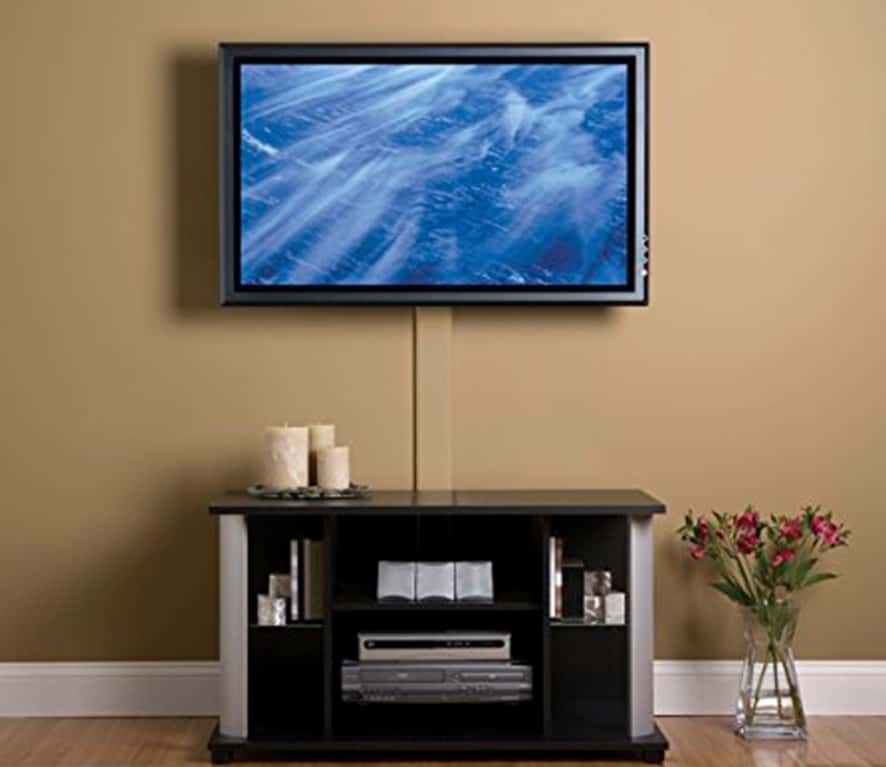
I feel like this is the classiest way to organise cables coming from places like TV, set-top box, etc and give them an invisibility cloak to blend in with the walls. These tiny little rectangular tunnels can be assembled like Lego and adhere to any surface. Get it on any e-commerce site like Amazon.
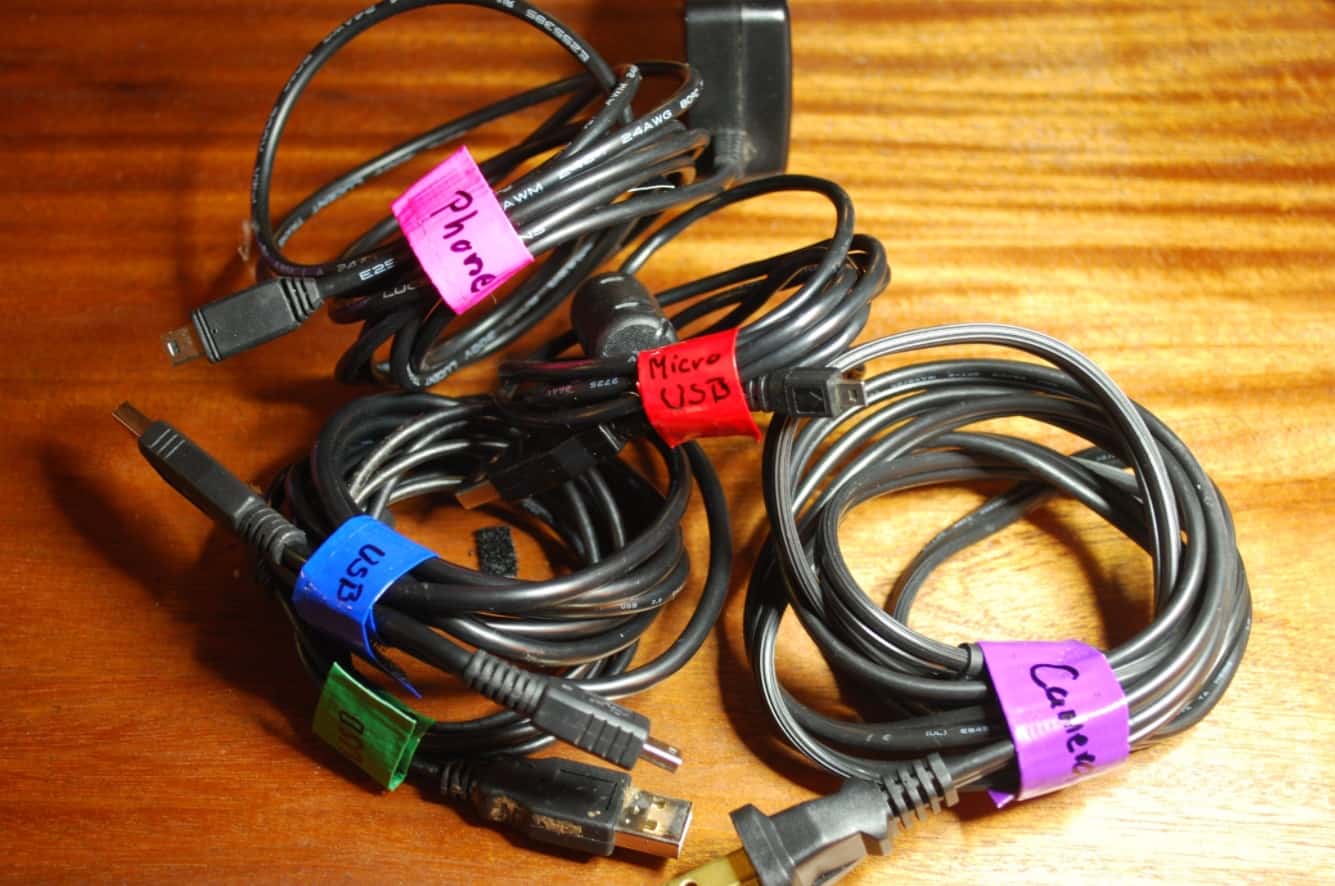
7. Thread it!
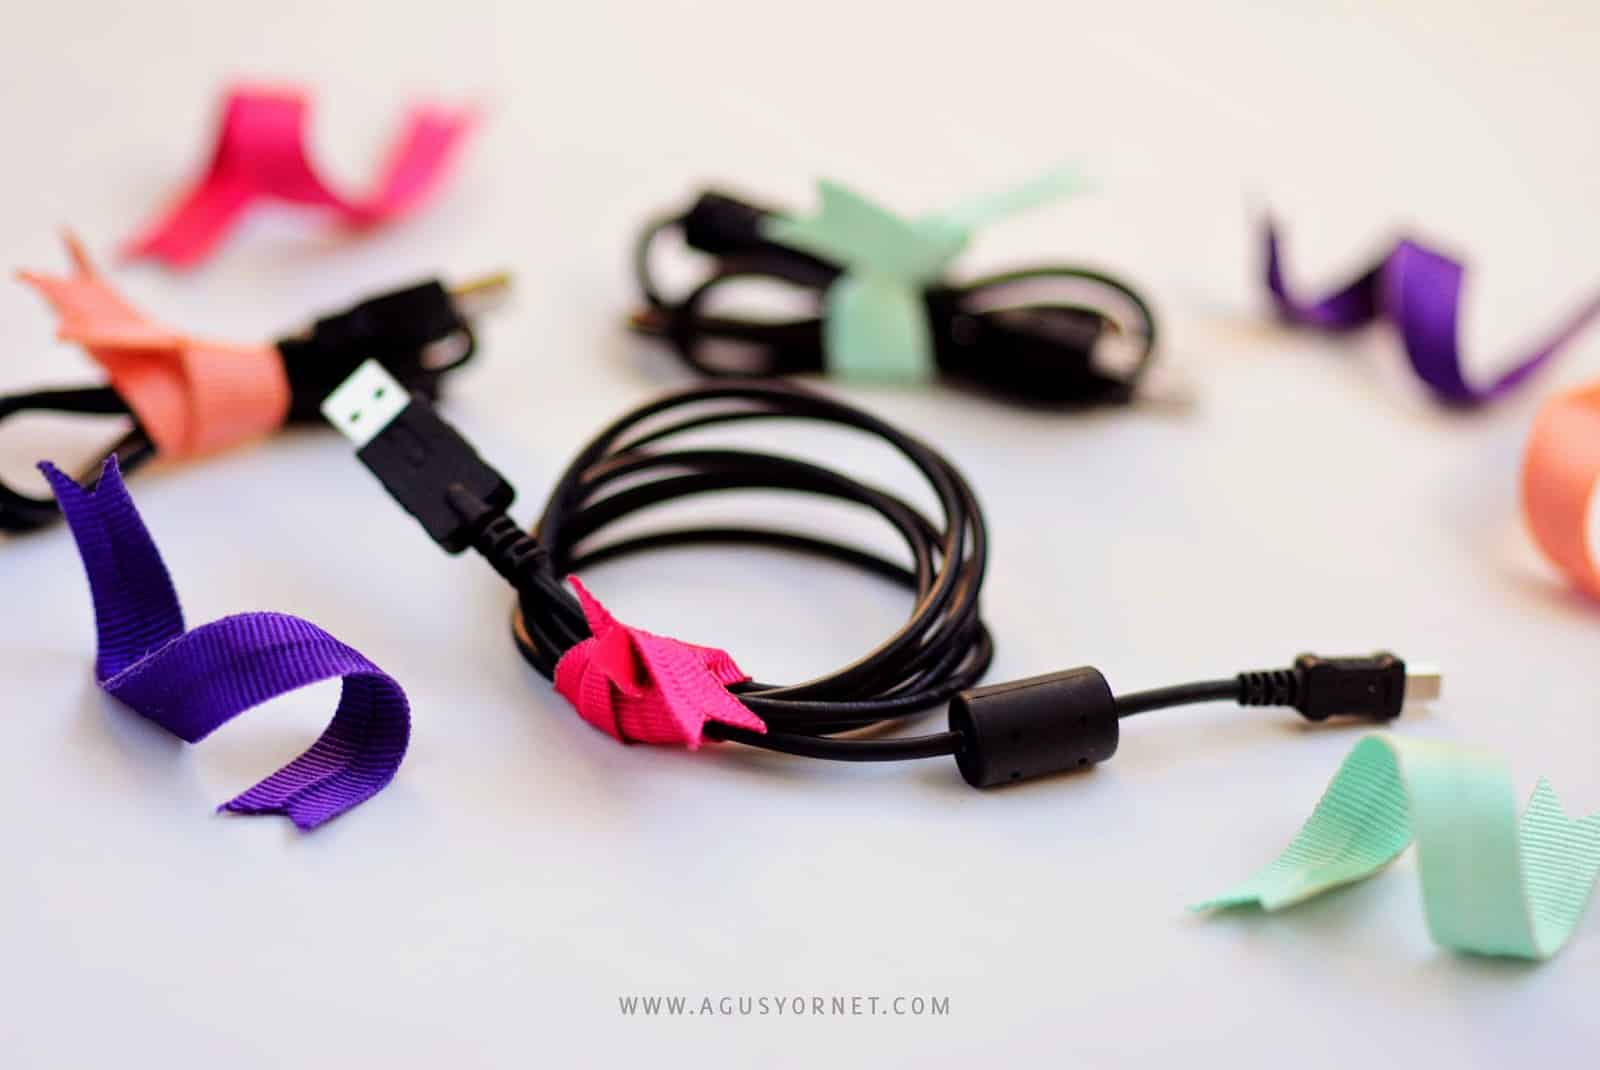
This is the cheapest and, in my opinion, the cutest way to organise your cables to aggregate them temporarily. Use a thick ribbon with any design you like- you can even paint them to colour code the wires- and simply tie the over the bunched cords tightly! You can write numbers, names and details of the wires on the thread for you to identify them quickly.
8. Be kinder with the Binder
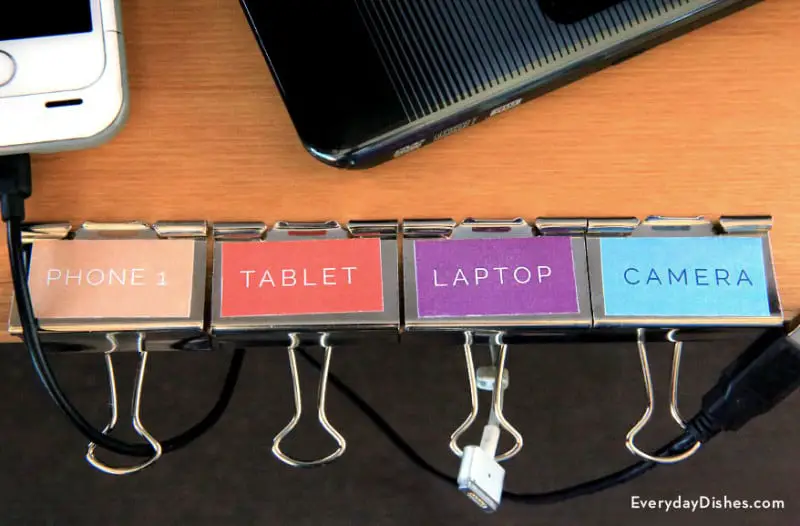
You are struggling on your desk right now. You cannot find your phone charger but it is somewhere. Once you find the end of it, you cannot figure out where the other end is! One more minute and you are disconnected from the call because the battery is dead. Instead, in a matter of 20 seconds, more or less, you can attach your binders along the side of the desk, insert the charging or other wires through the binders’ handle-loop area and start charging your phone in less than a minute.
The only catch in this technique is that you need to have binders large enough to cover the table thickness.
(Tip: Stick the clips with glue to give them a stronghold along the edge of your desk that will help them carry thicker wires through them)
9. All-purpose silicon putty (mouldable)
You checked the shops for clips to support the wires but none of them seems to have the exact number of slots you need, and in the right shape and size. Silicon putty is a massive advantage because you can mould it to carry wires of any dimensions and any numbers wherever you want. Using a toothpick, a pencil or skewers, you can form a custom cord holder by yourself.
10. Ultimate DIY desk cable management using wire tray
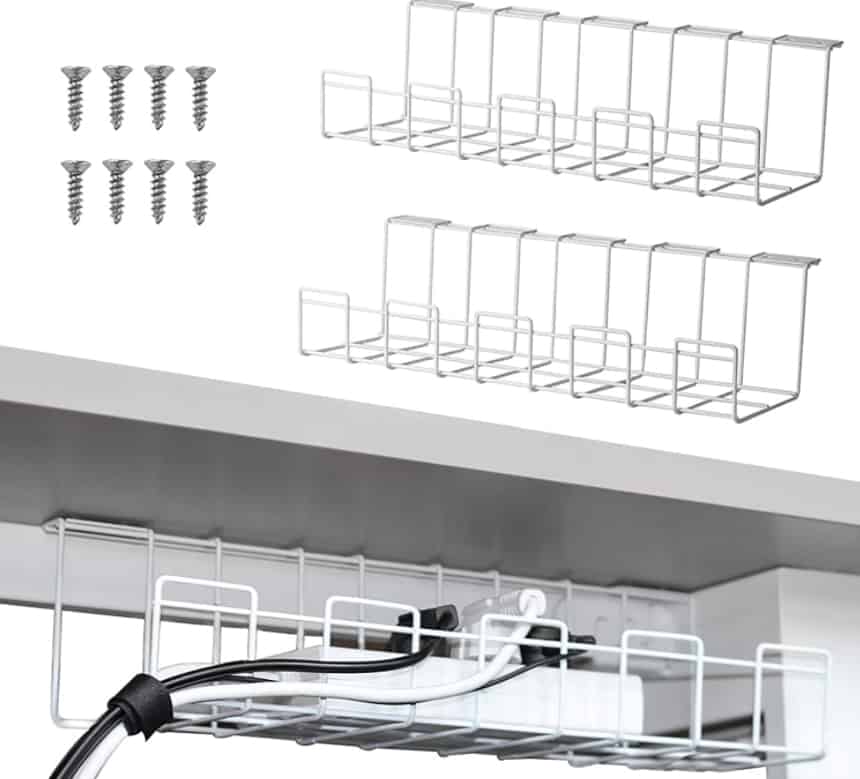
Baskets or wire trays are the big deal because they deal with big wires! This is the go-to choices of professionals who handle oodles of wires on daily basis and need to manage them efficiently without messing any order or locations. They are ubiquitous and not pricey at all.
(Tip: Instead of buying one, you can make it yourself by folding and rearranging cloth hangers and joining the ends by melting)
11. Bind with binder clips
If you have a desk thin enough to affix binder clips along a jutting edge, attach the clips along the edge of your desk and run the wires through them. Thicker cables might not go through or be supported by this technique though.
12. Power bar stuck under the desk
With the number of chargers and adapters sticking out of your power bar that lies randomly on one spot of the table or the floor, it feels like you are supplying electricity to an entire civilization. Hide them out of your view to prevent the eyesore by sticking them under your desk. All you require is a paper, small screws and a screwdriver.
Using a paper, trace the holes that can be attached to the desk and place the paper under the desk. Using the paper holes as a guide, drill in the screw, not completely- leave some gap. Then place the power bar and drill the screws onto it and fix it into place. There you have, your inconspicuous charging station!
13. Sleeves for the wires
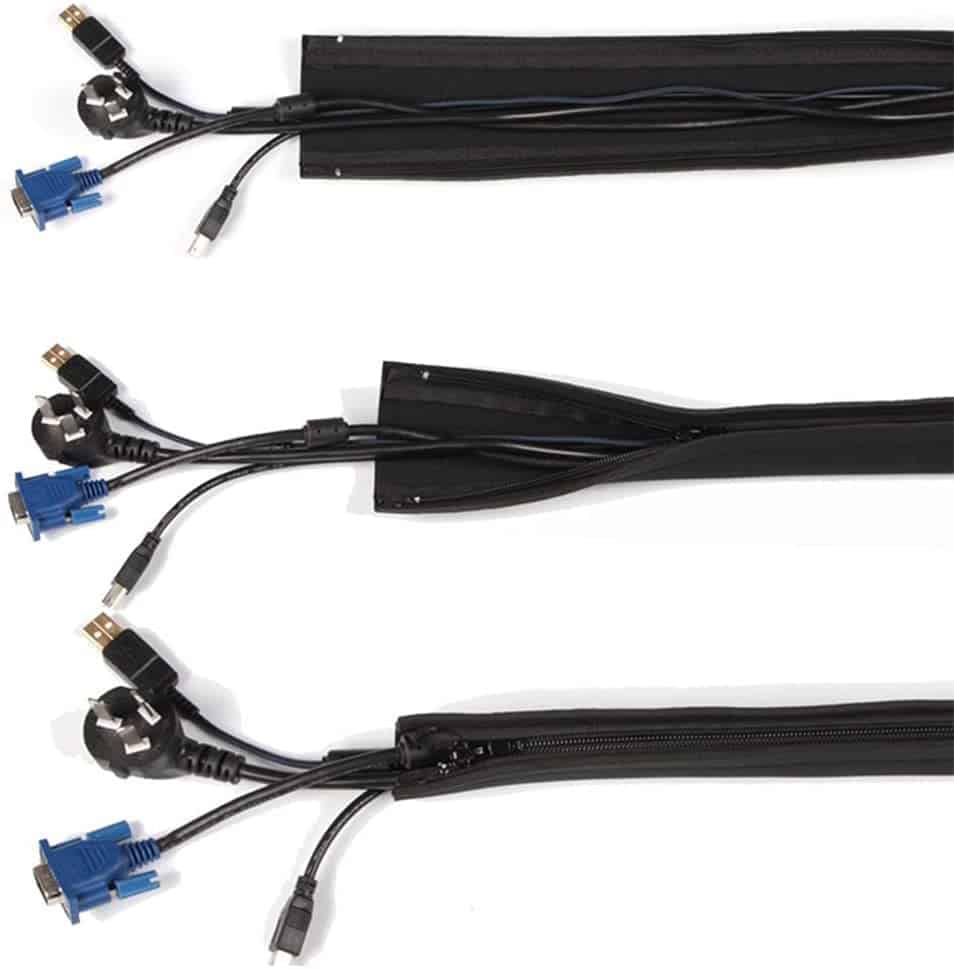
Dust collecting on wires? Wires snaking down the walls and floors? Give them a blanket! No, I am not joking- sleeves exist for wires and they serve the purpose of every other DIY cord management- organise! These sleeves come with a zip on the backside and enclose a lot of wires as they are flexible.
14. Toilet paper rolls
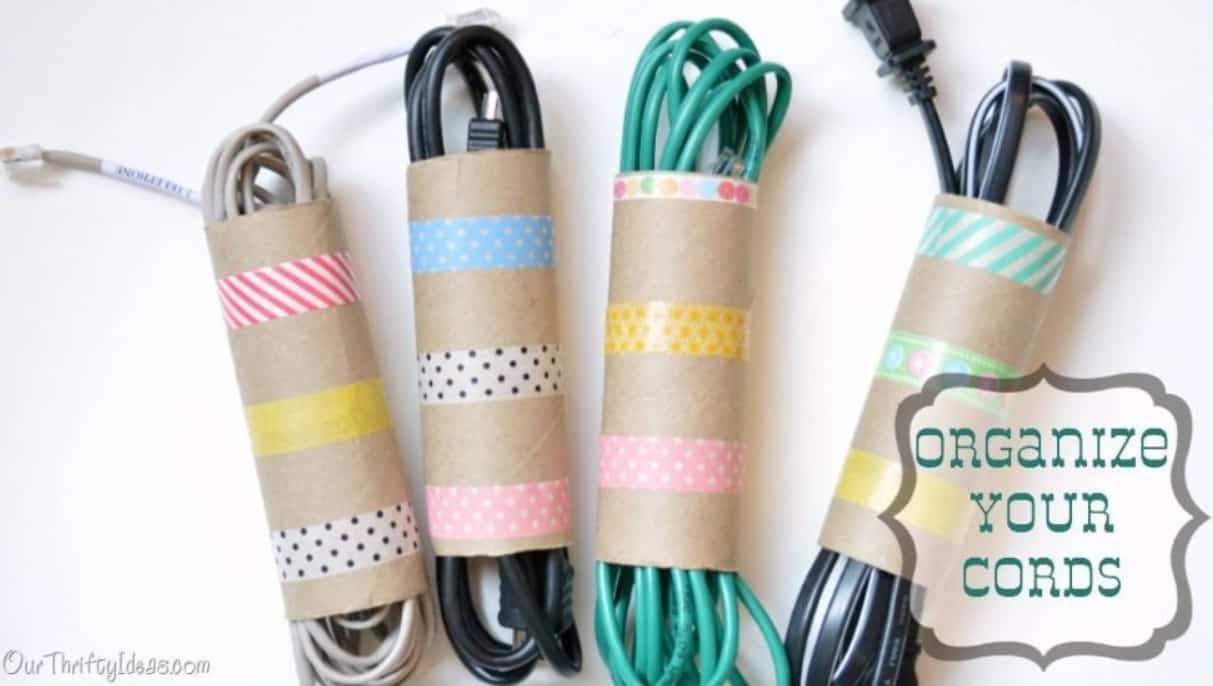
These rolls can home handy even after the toilet paper is over. The remaining cardboard cylinder can be used to bunch in your chargers and cords that you are not using into small confinement. You can paint and colour the rolls and label them as well.
15. Earphone organizers

This DIY cable organiser can be a fantastic gift to someone because who does not struggle with earphones from getting tangled? One cute idea is to use clay to mould it into the shape of a gingerbread man. Before clay dries out, punch a hole on each hand for inserting wires. Use sandpaper to give it the authentic texture and paint as you like. Now finally we can listen to music with peace!
16. Compartments of box
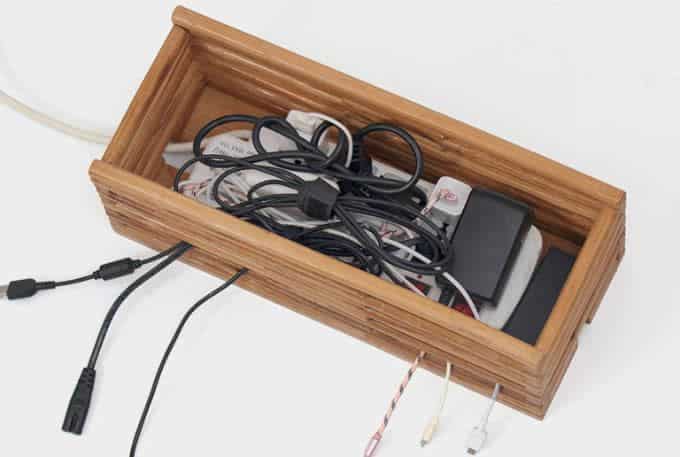
This is a DIY cable management box where you place unused wires into small compartments of this box instead of scattering it around your drawer. Place cardboard strips inside a shoebox or any cuboidal/cubic boxes to create compartments. Label compartments with colourful tapes.
17. Rack for cords
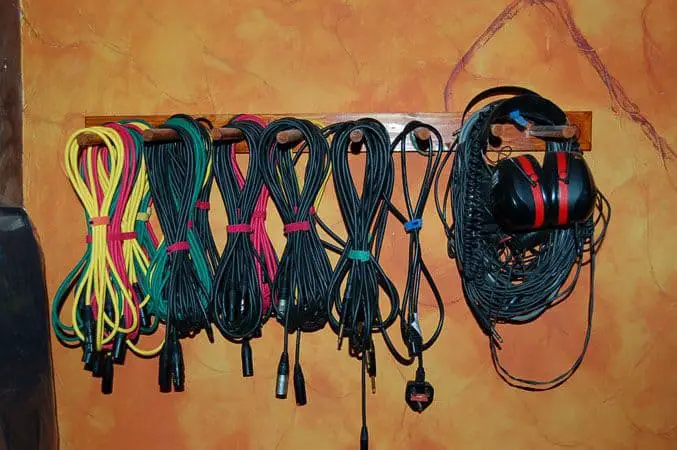
Similar to the concept of a shoe-rack, this is where you successively place your cords. On a wooden board, drill in large screws leaving a gap so that you can hang wires on top of it.
(Tip: measure the diameter of the cords after they are folded so that you can measure spaces requires to drill wires)
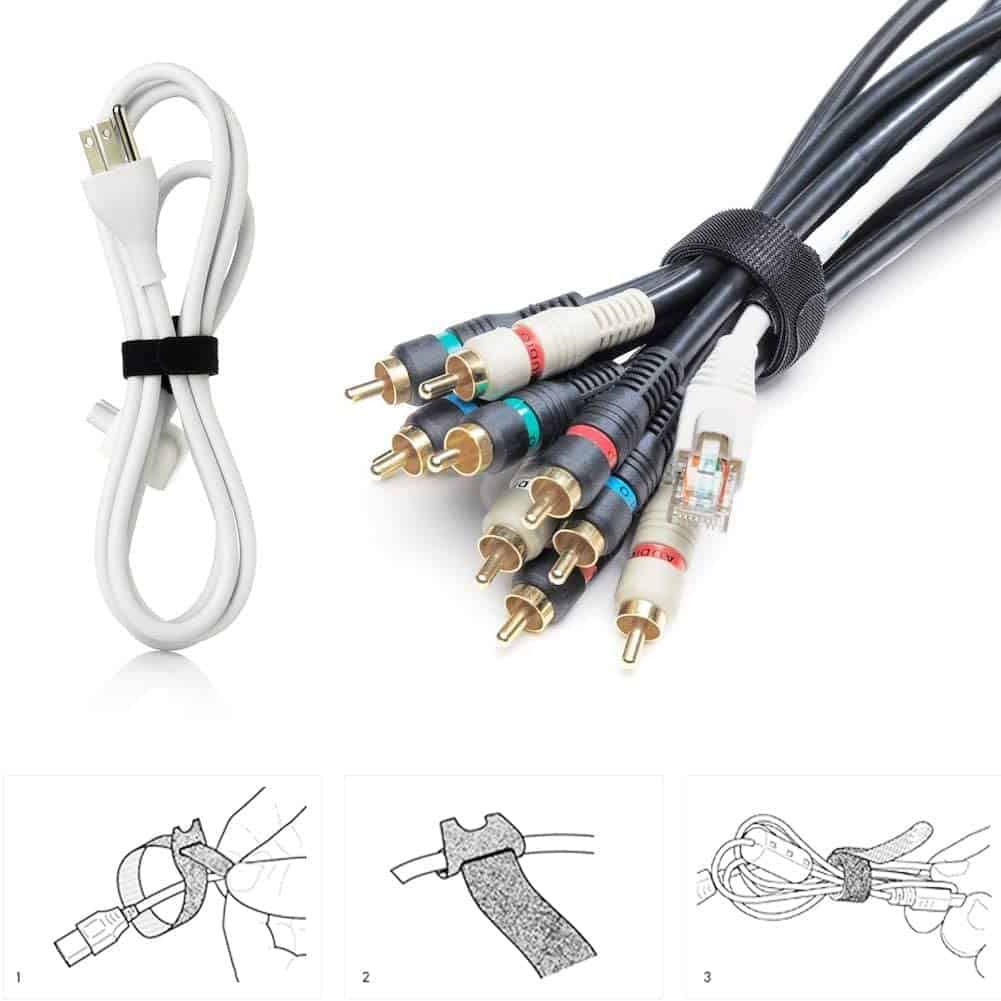
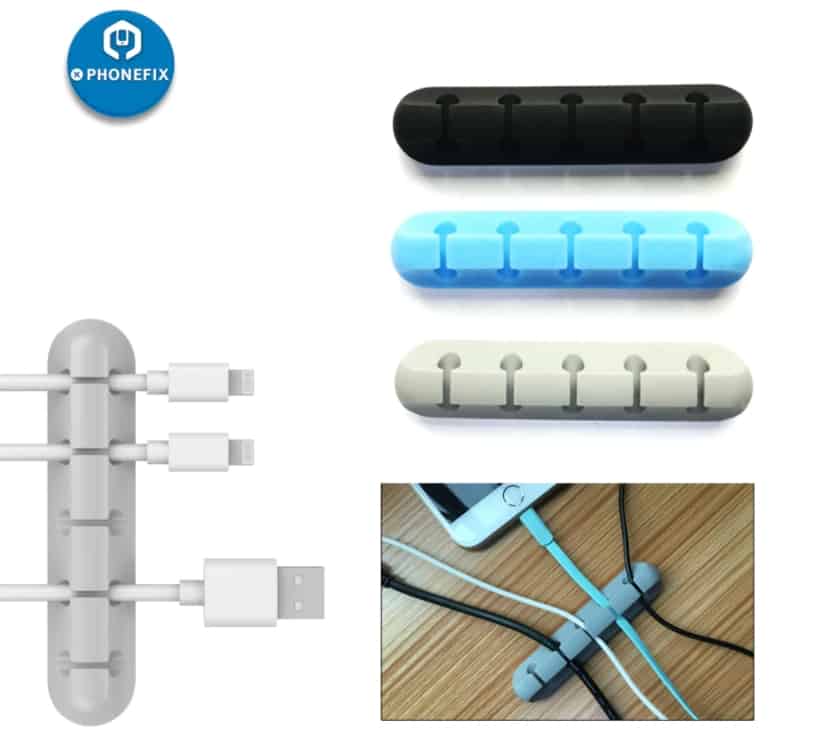
18. Zip ties but in Velcro form
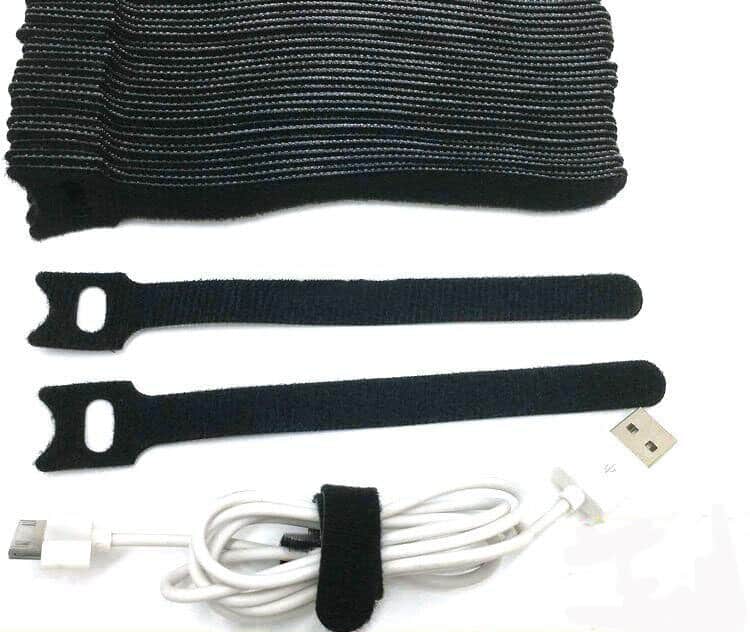
The problem of not being able to reuse a zip tie is solved by the Velcro form of it. Join in as many cables as you want. You must have already seen one such example for your laptop charger- it is the same concept except that here you can go unlimited on the number of cables you bunch up. You can coil super long cables and fold it into the Velcro tie.
(Tip: Separate the power cables from other types because it can cause some interfere in other devices like audios and Ethernet cables)
19. Cable clips with attached Zip liners
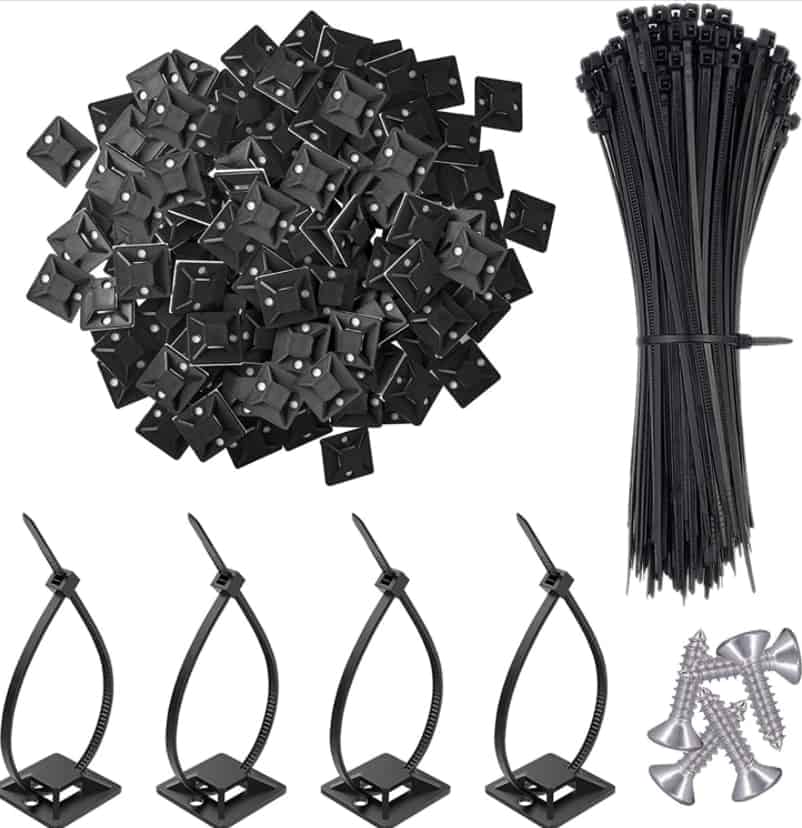
The base is a sticky pad with a hoop to allow zip liner to go through. Bunch in all your wires inside the liner. This will not only keep them together but also will prevent them from moving or sliding off as it holds the cords to one place.
You can browse through e-markets or your local hardware stores to get a wide variety of option that you can place and stick by yourself. They are super cheap. The gum is also strong and durable.
(Tip: use a light-impact gum lined cable clip if you do not want any risk regarding wall paint coming off. For strong gum options, stick on floors or places where you would not move them much)
20. Tape thy ducts
Yes, we are talking about duct tapes here. Whether it is long wires that need folding or if it is a bunch of wires that need aggregating, duct tapes are an instant DIY cable organiser. You can write over the colourful duct tapes to label the wires.
(Tip: Ensure that the inside of the tapes, which is the sticky part is covered with paper)
Conclusion
What are you waiting for? Unkempt environments affect moods! SO, do not delay in sorting out one of the important problems in your life and create your room hassle-free by performing a quick maintenance check! You have a lot of options to choose from that adapts best to your stimuli and purpose, so brandish them creative hands that didn’t create anything new after school crafts work and do the inevitable deed of DIY cord management!
